Bob's Bloggers
A community of bloggers who live and die to DIY
maintenance, plumbing, electrical
Installing a Water Heater Shut-Off Switch
By AZ DIY Guy's Projects on Aug 28, 2013
Last time, I mentioned I couldn't quite get to a water heater maintenance program without doing some repairs first. I figure step number one is to bring the electrical up to snuff. I decided to install a disconnect switch by the unit, so I don't have to trudge to the outdoor electrical panel every time I want to shut the unit off.

Before I could get going on this part, I had to replace the breaker. My predecessors had installed two, single pole breakers, rather than one double-pole 30 amp breaker. Not cool my friends.
_________________________________________
AZ DIY Guy's Scary Warning - Electrical Edition: Don't mess with electrical, unless you know what you are doing. 120 volts of household current can kill you just as dead as much higher voltages, it just lets you suffer longer, and folks can still recognize you in your casket. Plus, electrical issues can do a heck of a job burning your house right to the ground. When in doubt, get a professional electrician. If you do, this project is a snap for someone who's trained; it shouldn't cost too much. Even if you know what you are doing, I recommend you work it like it's live, even if it's not. Research legal requirements in your area before making changes to your electrical system. Finally, don't take my word for this stuff, I might be some random idiot on the internet.
_________________________________________

|
| No. Not cool at all. Those are separate breakers. |
I picked up a breaker at Home Depot for about 13 bucks. It was an easy swap; just a matter of turning off the main breaker for a minute while I slipped the two originals, popped the new one in, and re landed the wires.

Of course it couldn't go perfectly. I noticed, for the first time that this particular circuit's wiring was aluminum. I hate that I have aluminum wiring. More on that later.

|
| Cool. Very cool indeed. |
I turned off the new 2 pole circuit breaker and moved inside to open up the junction box to find,... a gob of black electrical tape, discolored wire and nicked insulation (clockwise below). Not good signs.
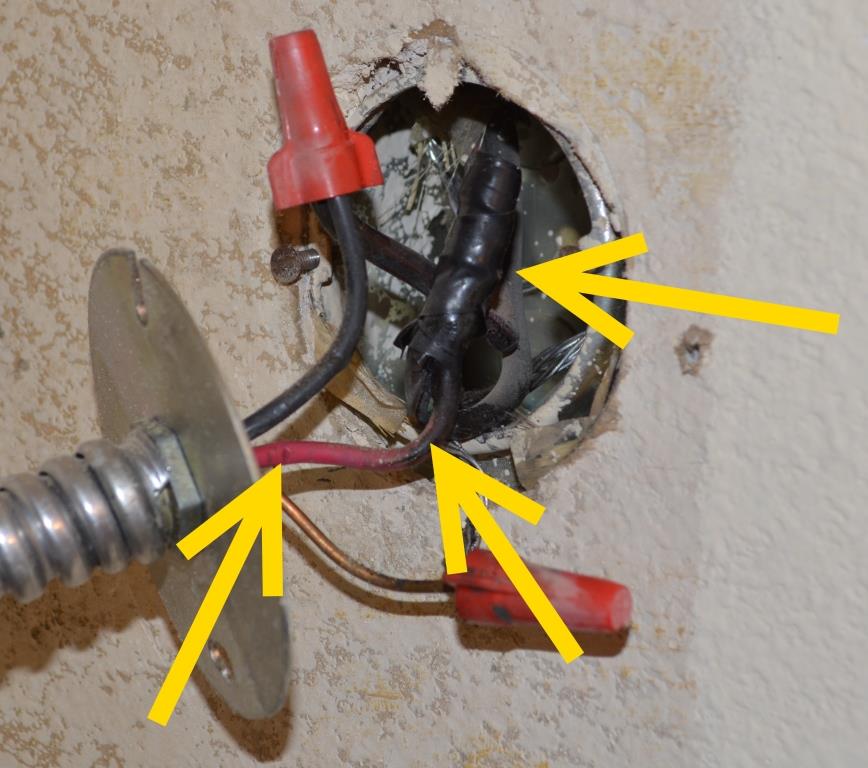
Since I don't trust ANYTHING in this place, I like to do a quick check to see if the circuit is still live. Especially if there's some sketchy looking wiring where I'm about to stick my fingers. Idiots could have easily landed one of the hot wires to the wrong breaker; it could light me up. No thanks. It's time to reach to the Bat Belt for my trusty non-contact voltage tester.


|
| Apparently, It's pretty serious. |
Ahhhhh,... sweet silence. The circuit is dead.

This is scary. The wire nut inside the tape glob is completely destroyed. Worse yet, where is the rest of it? There were no fragments or pieces of more than half of it, not in the tape, not in the junction box. To me, this means some mental giant actually knew this was busted and wrapped it in electrical tape, rather than simply installing a new wire nut. This could burn a house down to save the effort of installing a cheap wire nut. Jackassery! I think it's especially unsafe in that it's an aluminum to copper wire junction.

|
| That's an identical, complete wire nut on the right. |
Back over to the workbench, I set up to prefabricate the switch assembly. Here's the stuff:

- Diet Coke Lime
The lime is important. I can't find the reference exactly, but it's in the National Electrical code somewhere,...promise.
- Square Box Extension Ring
. This will extend the in-wall box allowing for more room to fit the switch and wiring.
- 4 In. Exposed Work 1 Toggle Switch Cover
- 30 Amp, 2 pole switch
I chose Leviton's extra heavy-duty spec-grade.
- Anti-Oxidant Compound
This gunk is required when you tie copper to aluminum wiring.
- Screws: 8/32's to screw the window box, and one ground screw to ground it. (... to rule them all!)
- Wire Nuts
..you know,...to nut wire.
I clipped the ears off the switch, so it would fit nicely behind the plate.

I pulled the existing 6/32 mounting screws out of the switch, since they're not needed here. Next, I stripped some new #10 copper wire and installed it behind all 4 termination screws, the line side (the "home run" to the breaker) on the black screws, load side (to the heater) on the brass.

|
| No, the WD-40 and the big ol' bottle of blowin' bubbles are not necessary. |
I like to put a wrap of electrical tape around the device, leaving a folded, courtesy tab for easy removal later.

Pop the cover on with the two short 6/32's (included with the cover) and we're ready to install.

The extension ring installs on the wall, screwed to the back box in the wall.
The stripped, bare copper and aluminum wires got a good bit of the anti-oxidization goop. Man! I wish we didn't have that aluminum wiring. At least it's only on a few circuits in the house.

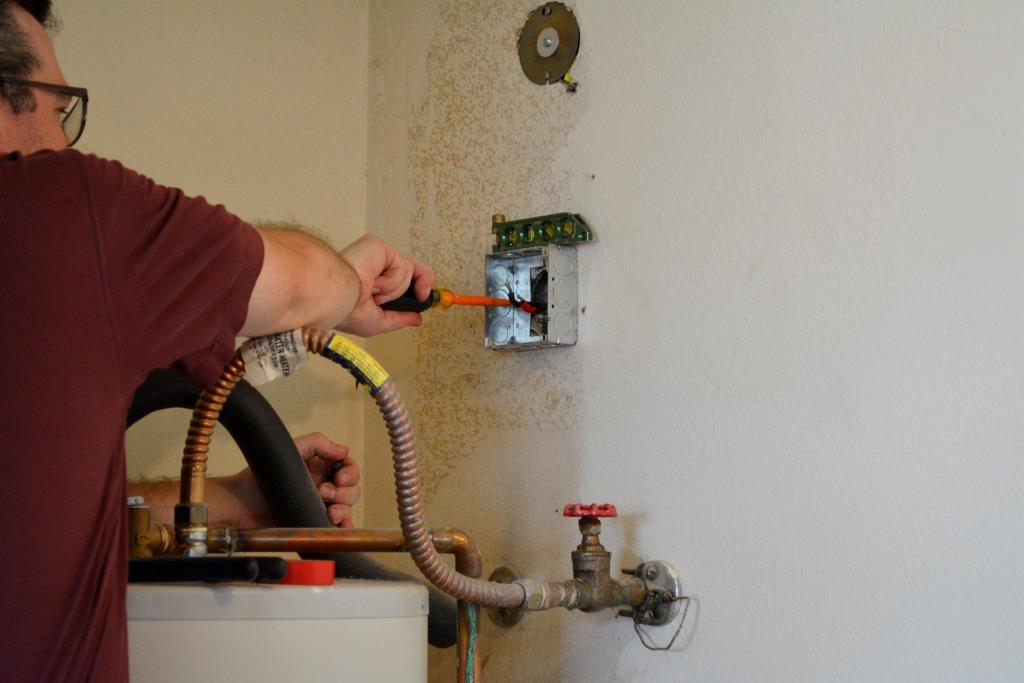
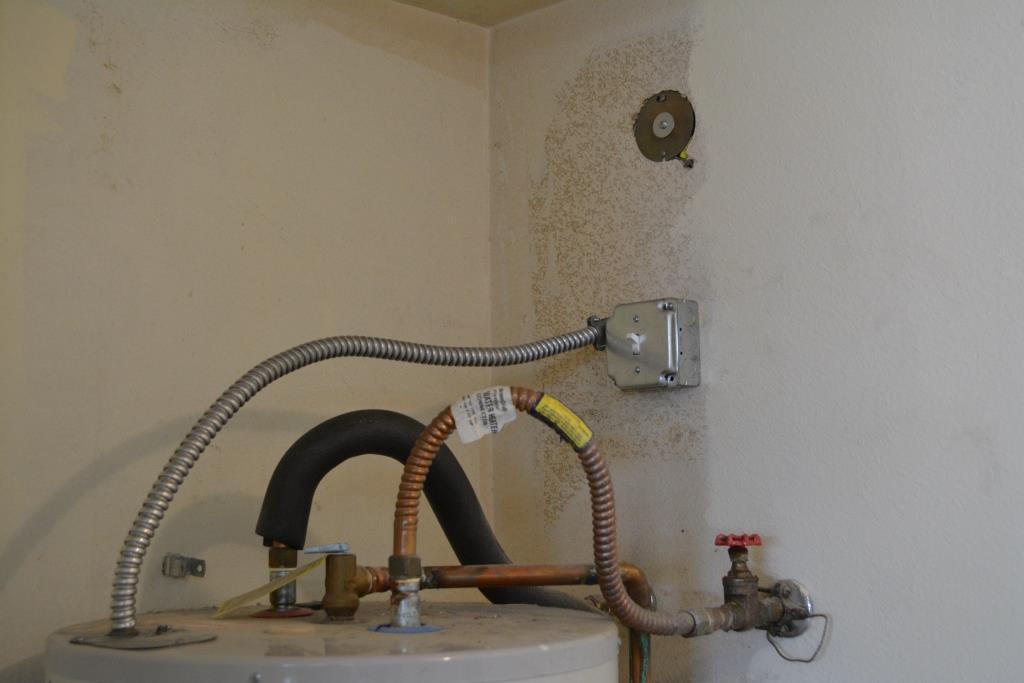
All wired up and sealed in place. I slipped on a 90 degree flex connector, pulled fresh new wire to the heater, terminated it, and sealed everything up.
.JPG)
Flip the breaker and power it up. We should be in business, just in time for the next laundry cycle. Now I can shut the whole thing off whenever I'm finally able to drain it for maintenance.
|
| Look good? |
To check the voltage, I popped off the front cover, peeled out a piece of insulation, and exposed the internal wiring terminations for the the heating element. Careful, careful,.. 120 volts from both of the hot conductors to ground and 240 between them. Done!

|
| 240,...243.7, whatever it takes. |
Next time kiddies, it's on to plumbing. I have to repair or replace that corroded, seized shut-off valve. I'll have to do some research on that one.
blog comments powered by Disqus