Bob's Bloggers
A community of bloggers who live and die to DIY
walls, how to
How To: Install Beadboard Wainscoting
By The Craftsman on Jul 16, 2012
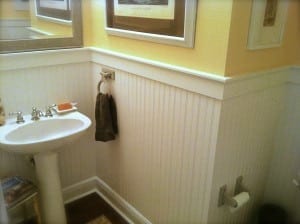 Wainscoting is one of the best ways to dress up a boring room. And for a historic home’s bathroom nothing fits better than breadboard wainscoting. We’ll walk you through the best way to install a true beaded-plank wainscoting by highlighting one of our latest projects.
Materials Needed:
- Beaded-plank boards in 3/4″ or 1/4″ thickness.
- 1×4 select Pine board for the top rail.
- 1×3 inexpensive backer boards.
- Cove molding.
- 1×2 select Pine for cap. (you can use any creative piece of trim to top your wainscoting. This is just what we used for this project.
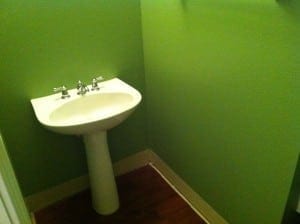
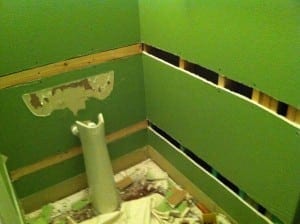
Take a look at the space you are planing to do the install. Remove everything from the walls that may be in the way including the baseboards and base cap if there is one. Save and label or number these so you can remember where they go later because they will be reinstalled at the end. The sink and toilet tank will also have to be removed if you are indeed working in a bathroom. Next, scribe a level line at the height you intend to run the wainscoting to.
Helpful Tips:
- When determining your height remember that your top rail will go above this and the cap will have to fit on top of that.
- Plan to use your materials wisely. The planks come in 8′ or 12′ lengths so using a 48″ or less height for your wainscoting will allow you to get twice as much footage from your materials opposed to more than 48″.
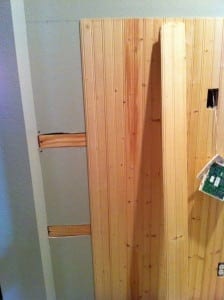
Use a Rotozip or keyhole saw and razor knife to remove 2 horizontal strips of the drywall the size of the backer boards. Rip the backer boards down to 1/2″ (or whatever the thickness of the drywall/plaster is) and after cutting them to length screw them into the studs and screw the drywall into the studs as well to make sure it is secured properly and flush. Each beaded-plank will get one nail into each of these back boards and the bottom plate of the framing.
Some people recommend just using construction adhesive to hold your wainscoting in place. I have done it in the past and found that installing backer boards provides a much more secure installation.
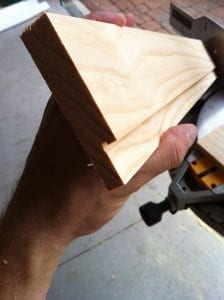
Start your installation at the outside corner. Cut the groove side of the two corner boards at a 45° angle. Use a little glue and get this joint tight and straight before nailing it. These first boards are the most important to set straight. Once you are happy with this joint move along the wall installing the breadboard. Continue installing keeping in mind that you’ll need to notch out for electrical boxes and any pipes.
If you’re using 3/4″ beadboard you can blind nail the boards into the backer boards through the tongue. If you’re using 1/4″ you’ll need to face nail the boards because the tongue is to thin to secure the boards properly.
Rabbet out the back of the top rail to accept the beadboard. If you’re using 3/4″ breadboard you’ll need another piece of backboard installed behind the top rail. This rabbet allows the top rail to hold the top of the breadboard securely to the wall and hide the cut ends. Nail the top rail into the studs
For this project we cut our cap stock to 1 1/2″ and rounded the edges just a bit so that we could also install a 3/4″ cove molding underneath the cap. Lay the cap flat above the top rail and nail it down into the top rail using 15 ga 2″ nails. Don’t forget the notch the cap to accept the door casings.
Install the cove molding underneath the cap for a bit more dimension and visual interest.
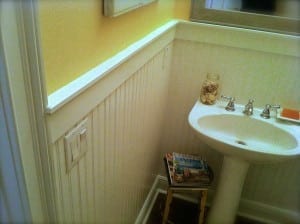 Step 5 Re-install Baseboards and Paint
Bring your baseboards back and reinstall them. Caulk all the joints especially where the baseboards meet each of the little gaps the breadboard creates behind them. Fill all the nail holes with painters putty. Then prime one coat and paint two coats with a high quality semi-gloss or satin enamel trim paint. On this project we used Sherwin-Williams Pro-Classic Semi-Gloss Waterbased Acrylic-Alkyd for a nice hard finish without the messy oil-based clean up.
All Finished!
After you’re done painting you can put back the sink, toilet tank and switch plates. Now it’s time to sit back and enjoy your new beadboard wainscoting!
Send us pics of your own beadboard wainscoting project at info@austinhomerestorations.com. We’d love to see it!
Any products mentioned are not paid endorsements but honest recommendations from the author.
blog comments powered by Disqus