Bob's Bloggers
A community of bloggers who live and die to DIY
diy, trim & molding, windows, installation
How To: Install Trim on a Double Window
By Remodelando la Casa on Aug 19, 2013
f 
My dining room makeover was done a couple of months ago. It began with a pair of painted chairs and ended up with a whole room face-lift. The window trim was the second project to be tackled in the room. I wasn't thinking on doing a post about it, I had already done one for the two single windows in my bedroom and the whole process is very similar, but some readers noticed the added trim (yeah, some of you have sharp eyes), and asked me some questions about it.
This post answers those questions, but I also share some new tricks I've learned after doing the whole process once again.
This picture below is how the window looked: two windows placed close together sharing the same sill.

Tools you will need:
- Miter box and saw (miter saw will be even better)
- Jig saw
- Sander
- Pneumatic nail gun
- Pray bar
- Utility knife
- Wood shims
- level
This next picture shows you the materials I used. I try to use stock material, stuff I can find at the big home centers or lumber centers. Most of the time, I use poplar or pine, but you can use other materials like MDF — I just don't want to deal with the long cuts and rough edges.
I haven't been able to buy the stool piece (1 x 5), from any other place than Home Depot and they only carry those in pine.

The first step is to get rid of the stool and apron your window has, they are too short to cover the area for the side casings that will be added later on.
Using the utility knife cut the caulking all around the stool and apron, especially around the wall, to prevent damage to it.

With the help of a pry bar and using a wood shim, again, to prevent damage to the wall, begin lifting the apron. Loosing it all along and then taking it off. Continue by lifting and getting rid of the stool.
Clean any remaining of caulking around the wall and window area.

Your old stool is the perfect template to create the new one.

You have to add to the width of your window:
- The width of the side casings 3.5" → 7" for both sides.
- The "horn" which is the protruding lip or ledge that go beyond the outer edge of the vertical window casings, 1" → 2" both sides.
- The reveal line, 1/4" →1/2" both sides.

Then, use the jig saw to cut the marked ends...
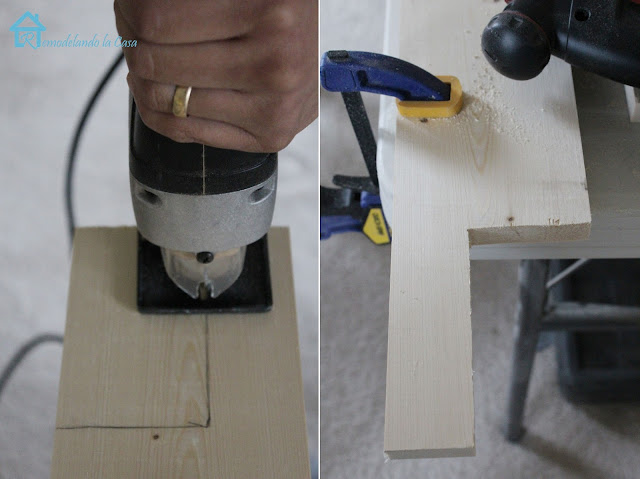
...and the center marked area.

This time the apron was installed first while holding the stool in place and checking for the whole piece to be level.

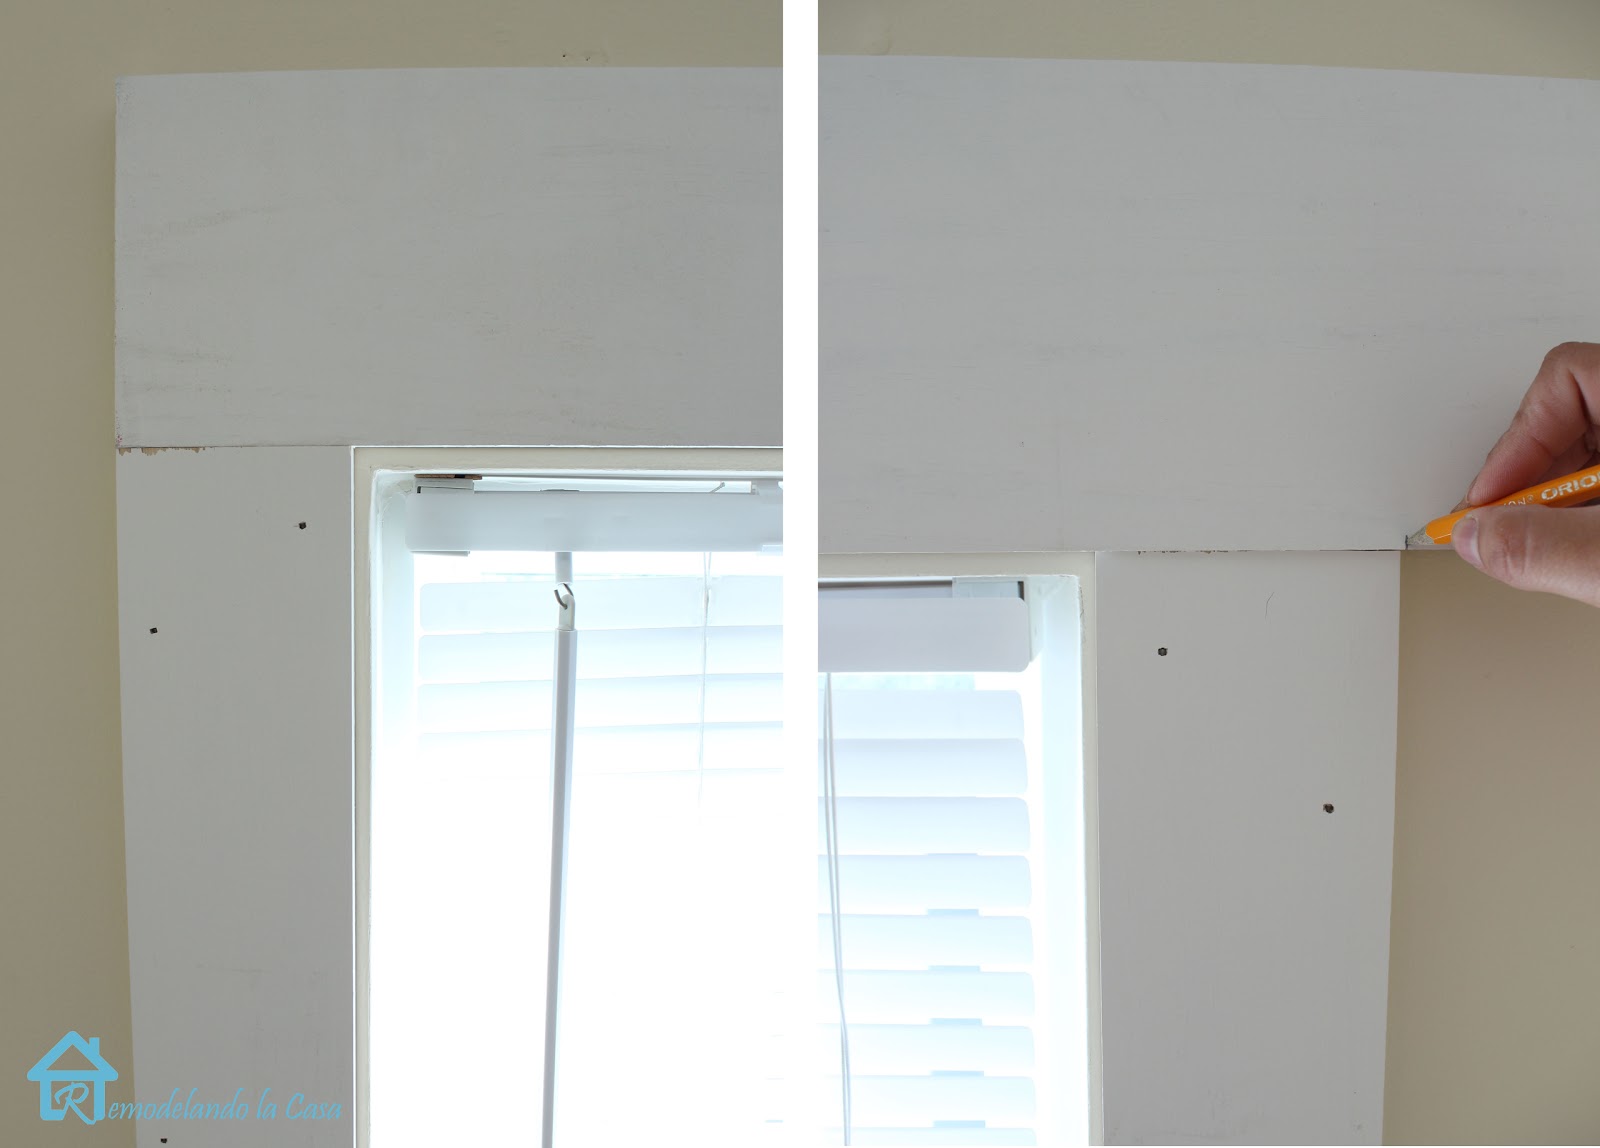
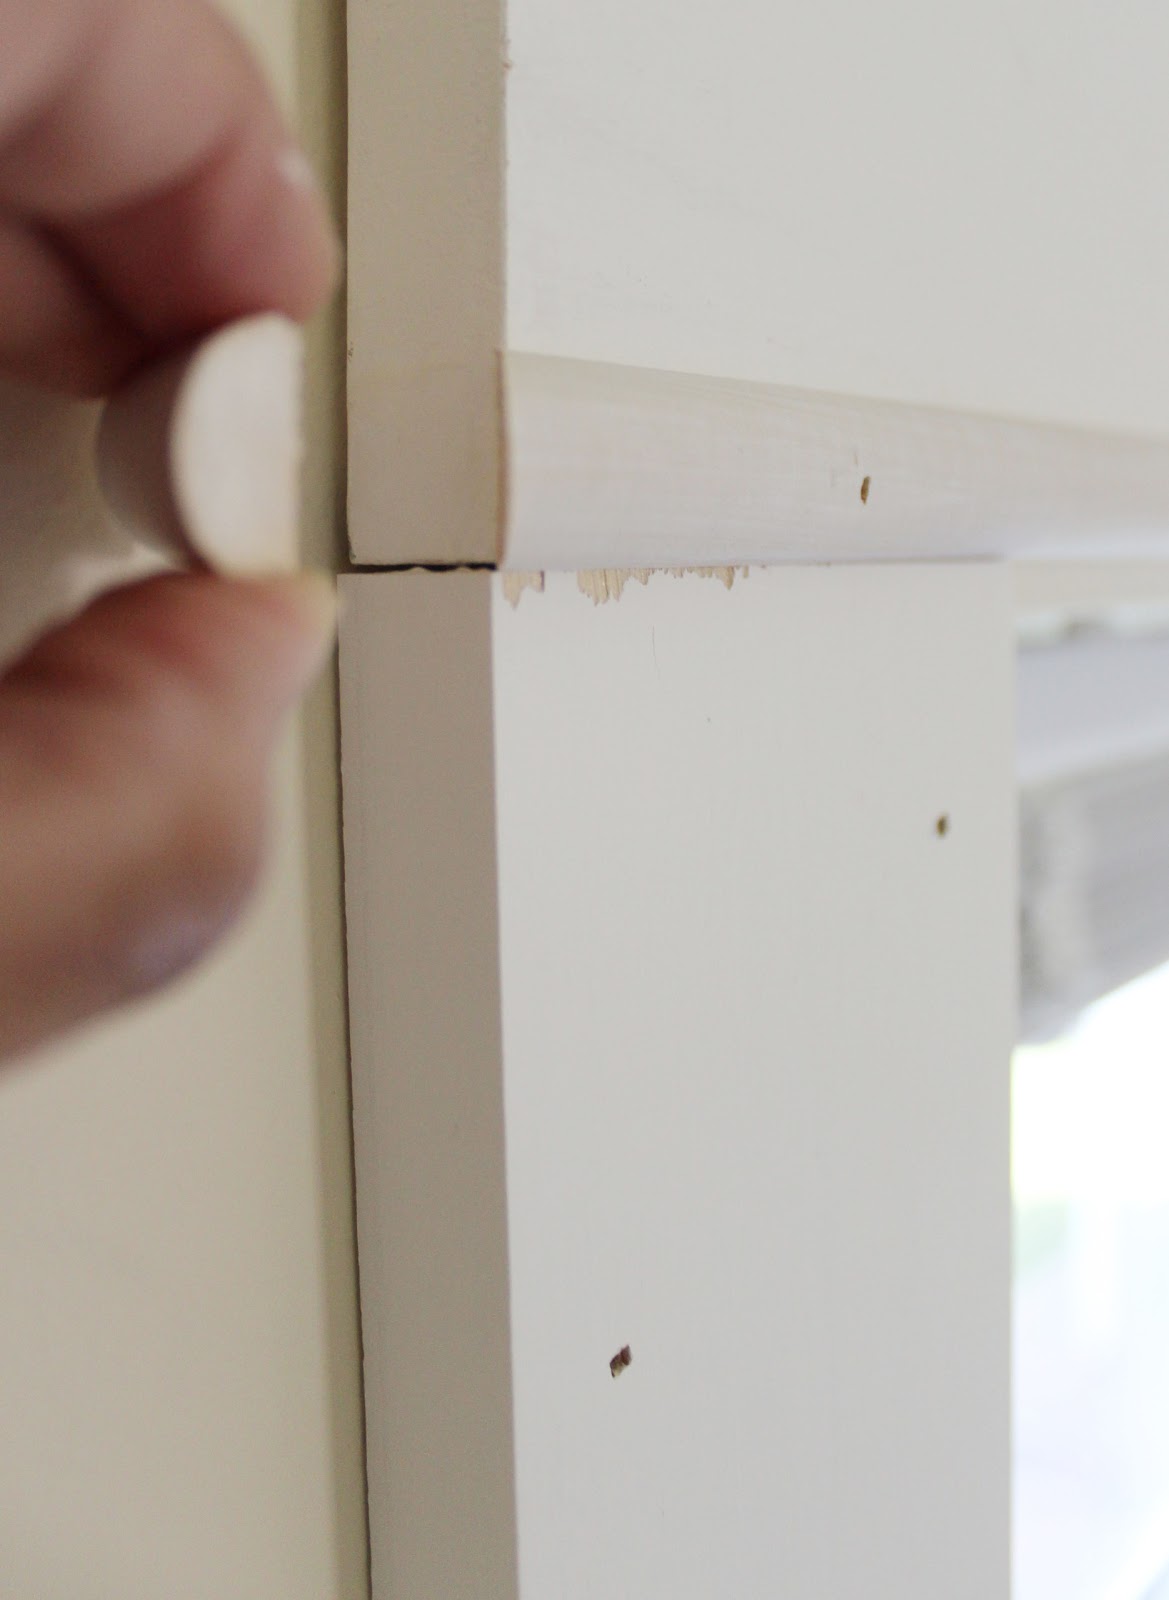
With the apron and stool in place, now is the time to install the side casings. To determine their length, measure the distance from the stool to the top opening of the window, add 1/4" for reveal line. Nail them in place. Don't forget to leave the 1/4" reveal line to the side of the window.
The reveal line helps not to end up with a seam where the edge of your window lines up with the edge of the boards; it's a better transition.

After both side casings are installed you can go ahead and measure the head casing. A simple way to measure its length is by placing the 1 x 6 material on top of the side casings and aligning it to one side (picture below). I even placed a piece of tape for the material to stay in place while I went to make a mark on the other side ;)

Once marked, you can go ahead and cut it.
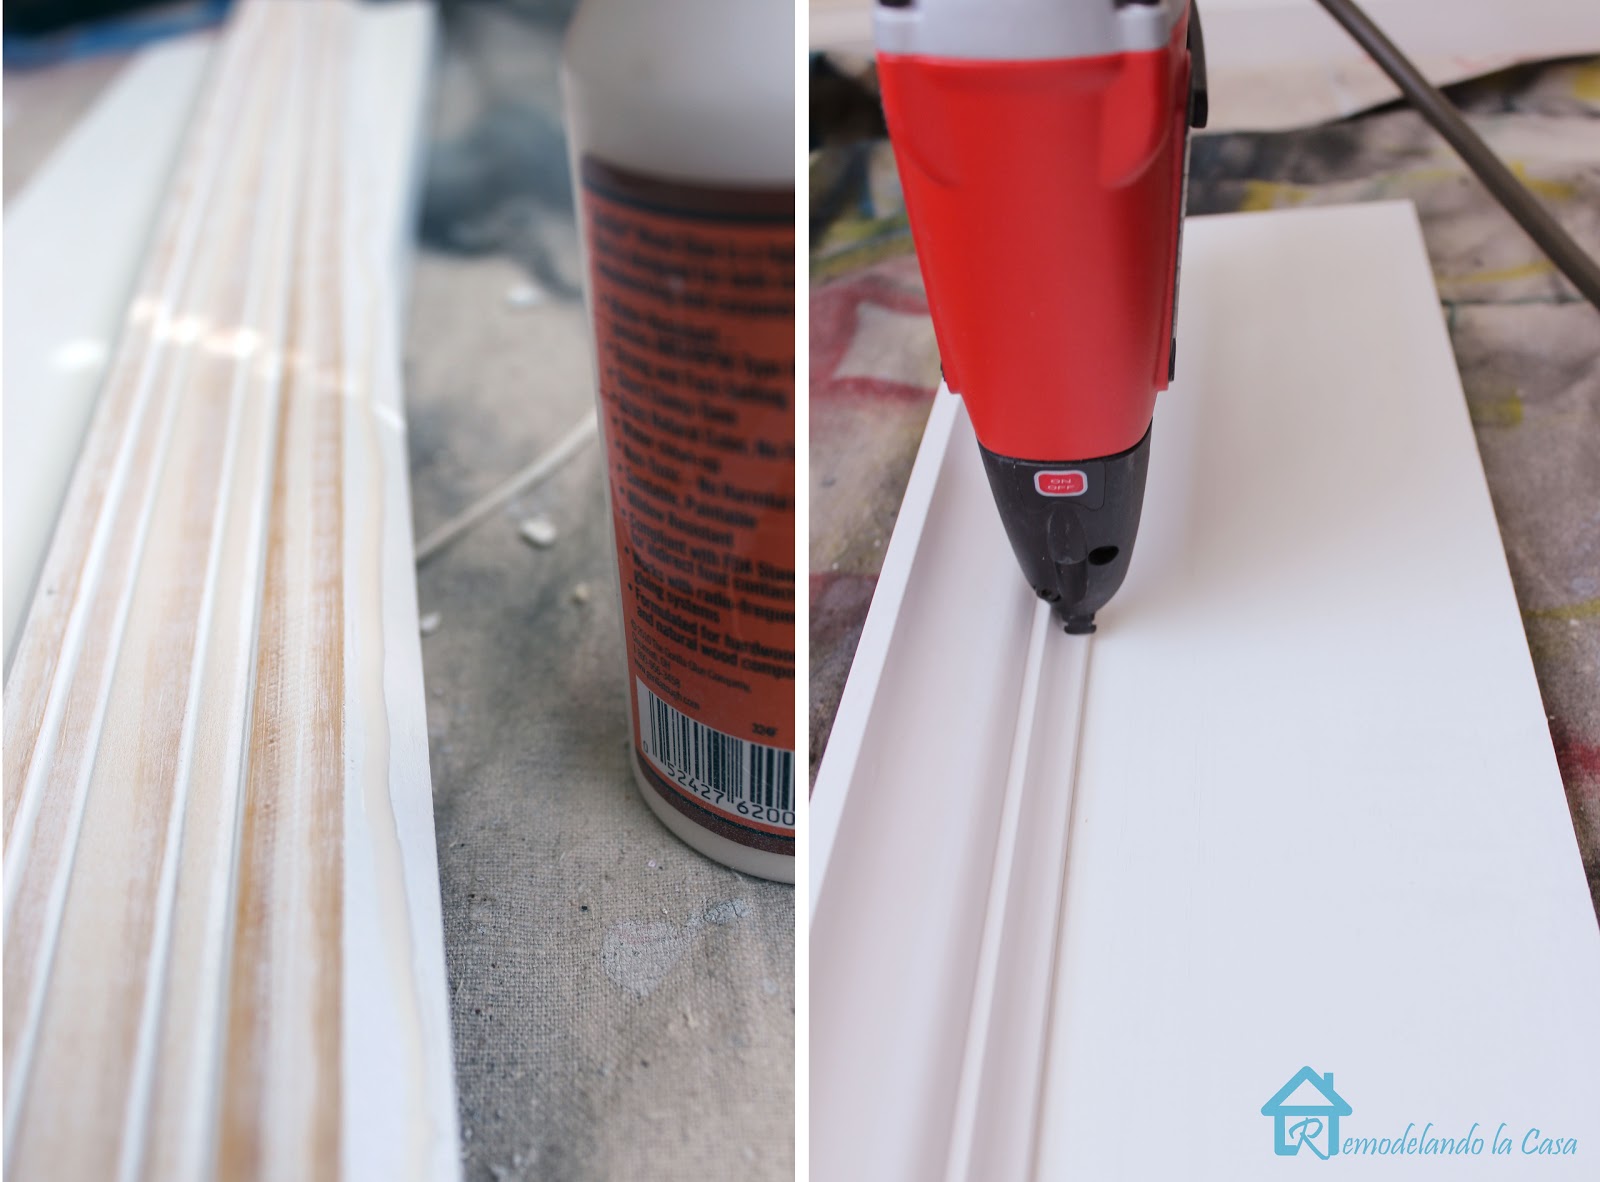
One more thing I learned is that is waaay better to attach the crown molding to the head casing before the latter one it's installed in place.
Cut the crown molding up side down and in a 45° angle, remember that the short side of the crown molding has to be the same length as of the head casing.

Add a line of glue to the lower back edge of the crown molding and nail it to the top edge of the head casing.
Glue the crown returns in place. -I went ahead and add a nail to this side return, and yeap, it splitted it a bit :( That's why I usually only use glue and place a piece of tape while the glue dries to set them in place.
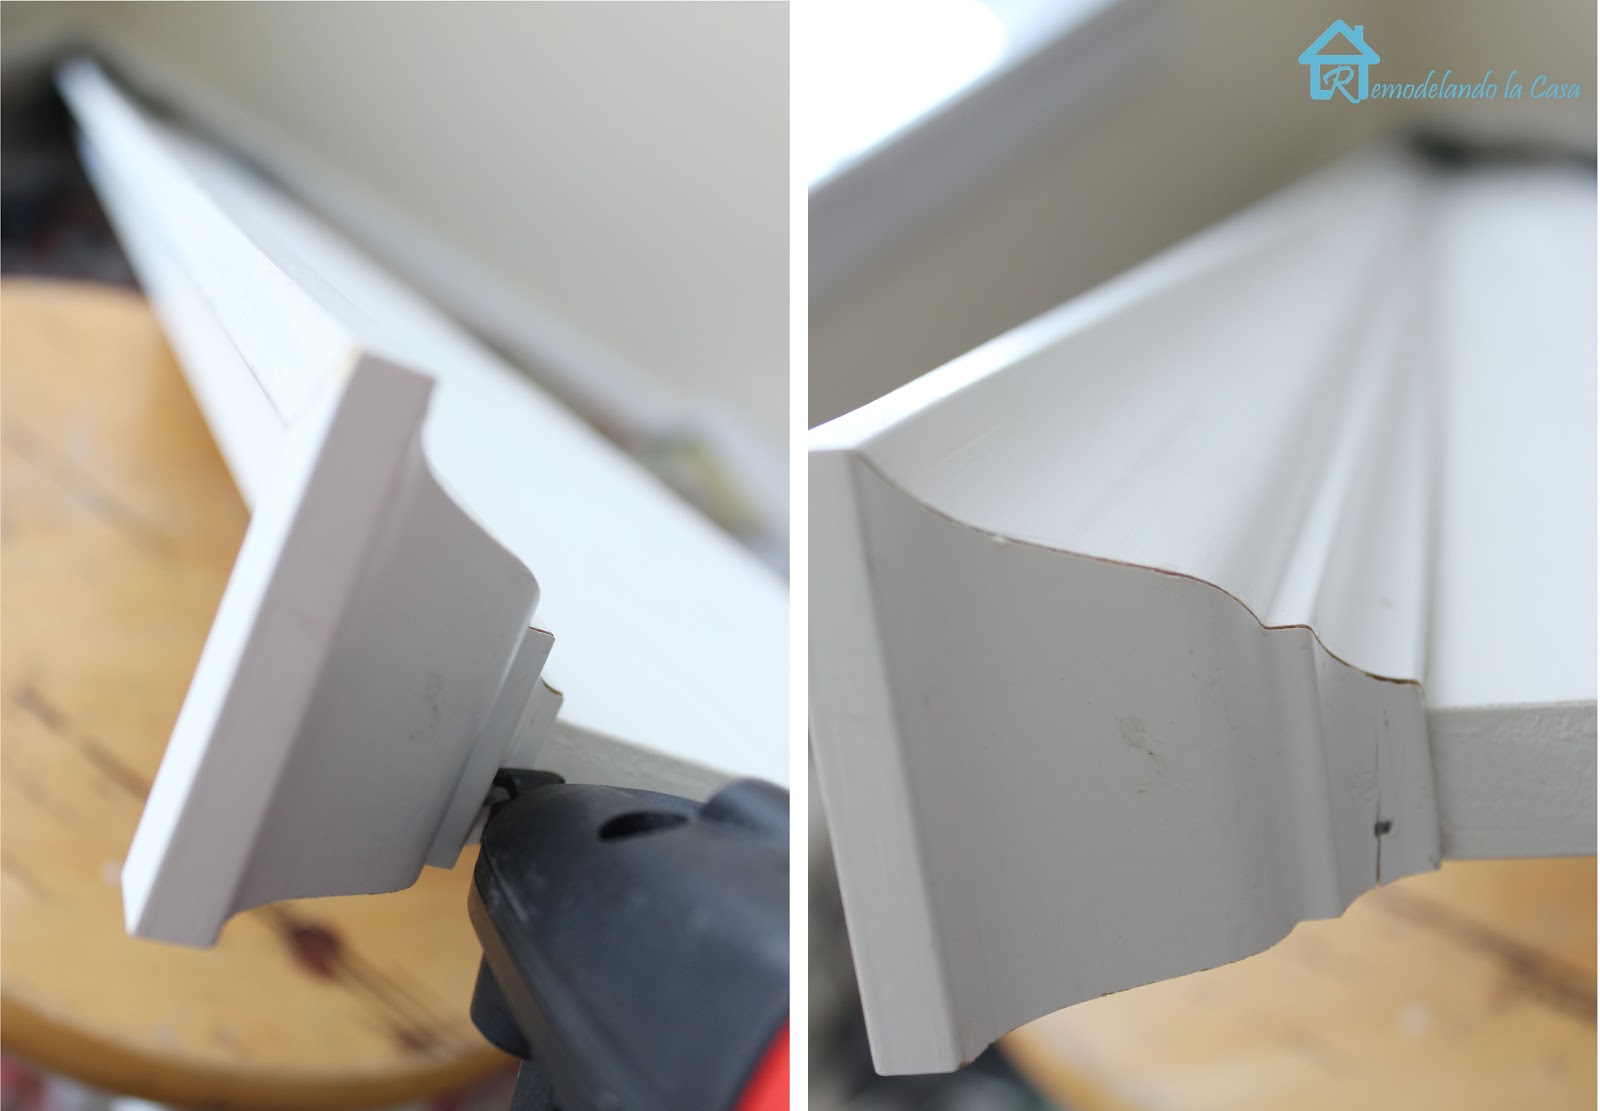
With the crown in place, go ahead and install the head casing. Only two more items remain for installation, the center casing and the decorative half round at the bottom of the head casing.

Again, the short side of the half round is the same length of the head casing. Cut it at a 45° angle.

Nail it at the bottom of the head casing. Glue the half round returns in place.
For the center casing, measure the distance from the stool to the bottom of the head casing, that will determine its length, for the width simply leave the 1/4" reveal on both sides.

I was able to use the same 1 x 4 material, even though the reveal lines were about 1/3" they still look OK to me.

After filling all the gaps and holes with wood putty and caulking, a good sanding was done to smooth out all the surfaces and to round up all those sharp corners.

One coat of primer and two coats of semi gloss Behr Swiss Coffee were then applied. The blue color on the walls is a custom color created by mixing remnants of paint.

I think the trim makes a huge difference.

Don't you think so?
The old materials has been re-used. The apron that was taken off is now part of those shallow shelves in the same room.
;)