Bob's Bloggers
A community of bloggers who live and die to DIY
bathroom, tile, flooring
I Named the Tile Bon Qui Qui
By The Ugly Duckling House on May 10, 2012
Because it will cut you.
I was surprised to find that the edges of porcelain tile are rather sharp. I was also surprised to find that despite them being identically sized rectangles, they are not flat and level, which made installing them a little more challenging.
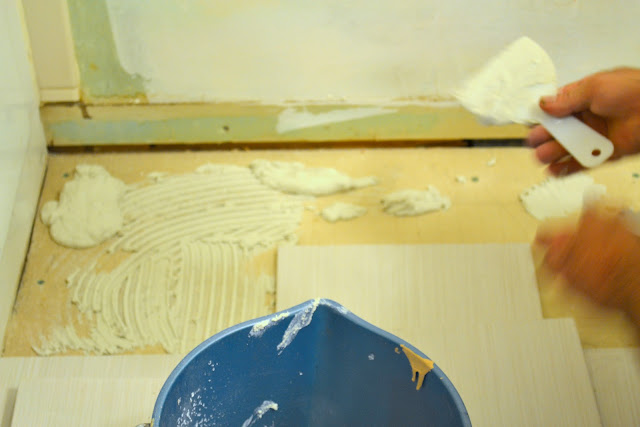
The tile I used in the bathroom is 12x24 inch porcelain tile called a rectified or "dimensionally stable" tile, which are both just ways of saying that they are the same size tile after tile. During the drying process, non-rectified tiles are cut to size, then baked. Rectified tile is cut to size after baking, so there's no shrinking, which allows for very thin grout lines (for this bathroom, we went with 1/16th spacers). And narrow grout lines means less opportunity for dirt to get into crevices (in other words, keeping right in my lazy girl wheelhouse).
The challenge about baking tiles this size is that they have a tendency to warp, which means that although the sizes are supposed to be all the same, the height will vary at different areas on any given tile. This can pose a problem when laying one tile against another; if they aren't level, the difference can be really obvious when the joints meet. This issue is frequently referred to as lippage. I use the same term when Charlie makes an Elvis face.
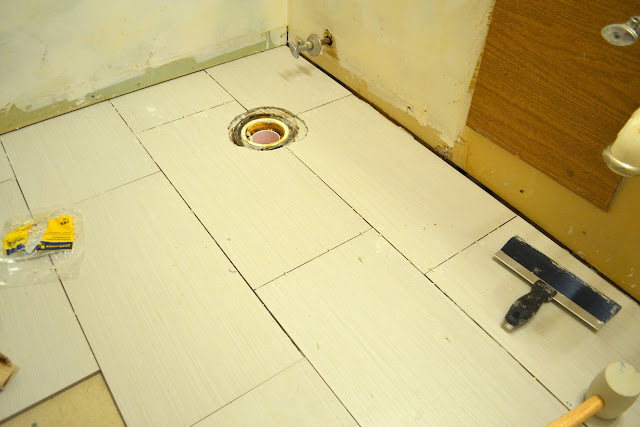
After a number of tries with dry fitting, a staggered brick pattern seemed to be the least likely to cause extreme lippage (the middle of the tile tends to be the most warped compared to each end, so doing a standard half brick pattern was the worst of the variations we tried).
While Tony was upstairs laying tile, I was outside on the lawn, cutting pieces to fit. I actually really enjoyed it. That is, until my Dad decided the tile saw needed more water, filled it with the hose, and proceeded to laugh at me while I got soaking wet. I guess he forgot the splash guard at home. Har har. That sludgy hair look is all the rage right now.

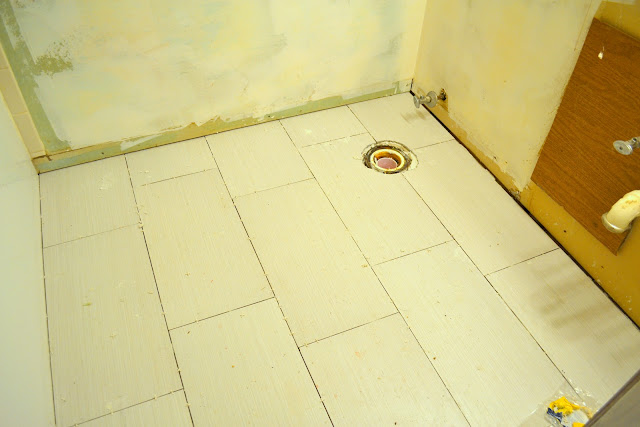
By the late afternoon, the tile was in, we were tired, and it was time to call it a day. I'll likely be grouting tonight now that I've let it cure for several days.
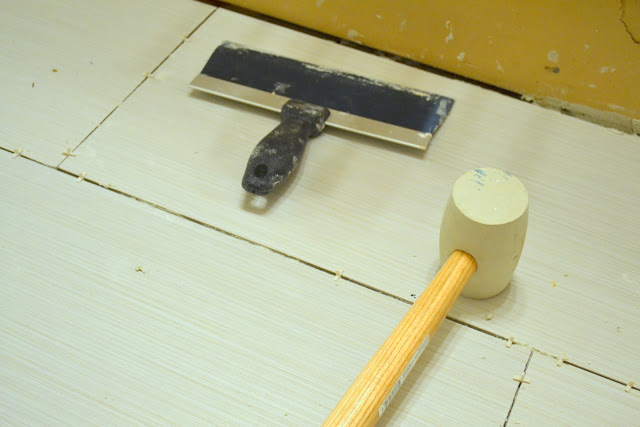
A tutorial (including all of our obvious unofficial tile tools, like my favorite taping knife) will be in the works when I do the master bath. This round was about learning how (the benefit of having two rooms that need the same things done to them), so I'll be taking more pictures when I do the next room. I am so relieved to be making progress in this room. Who knows? Maybe my next semester will start with a fully remodeled bathroom.
Well, maybe about halfway as usual. But with a toilet.

I was surprised to find that the edges of porcelain tile are rather sharp. I was also surprised to find that despite them being identically sized rectangles, they are not flat and level, which made installing them a little more challenging.
The tile I used in the bathroom is 12x24 inch porcelain tile called a rectified or "dimensionally stable" tile, which are both just ways of saying that they are the same size tile after tile. During the drying process, non-rectified tiles are cut to size, then baked. Rectified tile is cut to size after baking, so there's no shrinking, which allows for very thin grout lines (for this bathroom, we went with 1/16th spacers). And narrow grout lines means less opportunity for dirt to get into crevices (in other words, keeping right in my lazy girl wheelhouse).

The challenge about baking tiles this size is that they have a tendency to warp, which means that although the sizes are supposed to be all the same, the height will vary at different areas on any given tile. This can pose a problem when laying one tile against another; if they aren't level, the difference can be really obvious when the joints meet. This issue is frequently referred to as lippage. I use the same term when Charlie makes an Elvis face.
After a number of tries with dry fitting, a staggered brick pattern seemed to be the least likely to cause extreme lippage (the middle of the tile tends to be the most warped compared to each end, so doing a standard half brick pattern was the worst of the variations we tried).

While Tony was upstairs laying tile, I was outside on the lawn, cutting pieces to fit. I actually really enjoyed it. That is, until my Dad decided the tile saw needed more water, filled it with the hose, and proceeded to laugh at me while I got soaking wet. I guess he forgot the splash guard at home. Har har. That sludgy hair look is all the rage right now.

By the late afternoon, the tile was in, we were tired, and it was time to call it a day. I'll likely be grouting tonight now that I've let it cure for several days.

A tutorial (including all of our obvious unofficial tile tools, like my favorite taping knife) will be in the works when I do the master bath. This round was about learning how (the benefit of having two rooms that need the same things done to them), so I'll be taking more pictures when I do the next room. I am so relieved to be making progress in this room. Who knows? Maybe my next semester will start with a fully remodeled bathroom.
Well, maybe about halfway as usual. But with a toilet.

___________________________________________________________
If you liked this post, click the image below to subscribe. You can also find me on Pinterest, Facebook, and Twitter!


Visit The Ugly Duckling House »
blog comments powered by Disqus