Bob's Bloggers
A community of bloggers who live and die to DIY
sustainability, diy
DIY Tales: Improving Energy Efficiency in Our Old Home
By Living Vintage on Jan 08, 2014
When we first bought our house, it was not energy-efficient at all. Not by a long shot.
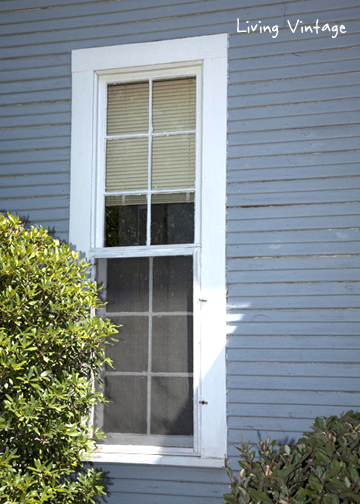
The windows were all old and single-pane. The two existing heat pump A/C units were old and ran on (expensive) propane. There was some insulation in the attic, and some blown-in insulation in the walls but what was there had settled over time.
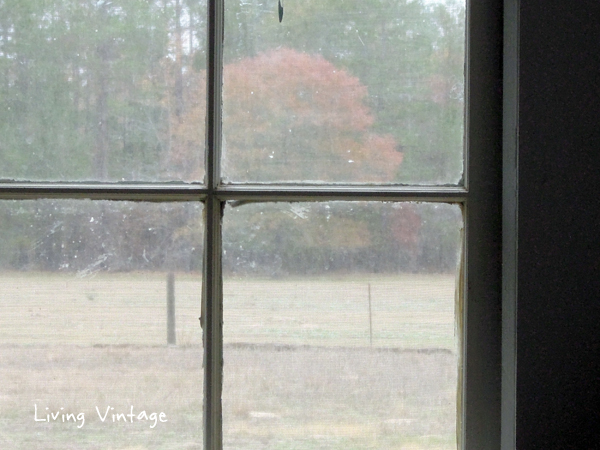
We knew when we bought our place that it was Priority One for us to make our home more energy efficient. No one likes to pay high utility bills and certainly not a frugal person like me. During our first winter here, we ran ONE of our heat pump units, for about a month total and it cost us close to $500 in propane, so after that, we survived using our fireplace and small space heaters. It was not pleasant. Many winter mornings we woke up to temperatures of 50 degrees inside the house.
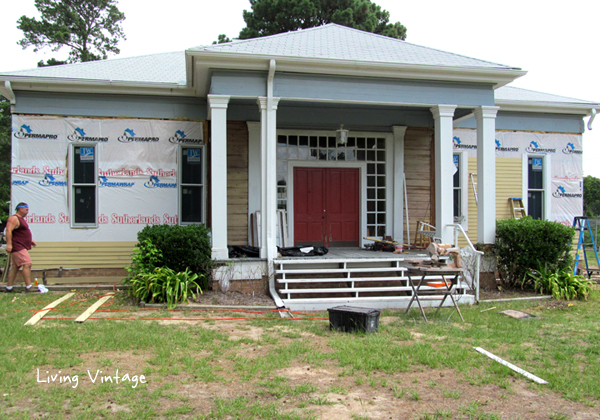
After our first cold winter here, we tackled our window, siding, and insulation replacement project the following Spring.
Since our old house has solid wood interior walls, we knew we had one of two choices: we could remove the wood from the interior walls, insulate in some fashion, then cover the walls up again …. or we could remove the exterior siding and during that process replace the old windows, insulation and add additional insulation.
We wanted to keep the character of our old place intact, I don’t like drywall, and our siding was in pretty bad shape, so we went with the latter option.
We’ve never regretted that decision.
I want to show you what we did. It was a ton of work, but it is achievable for anyone wanting to add energy efficiency to an old home.
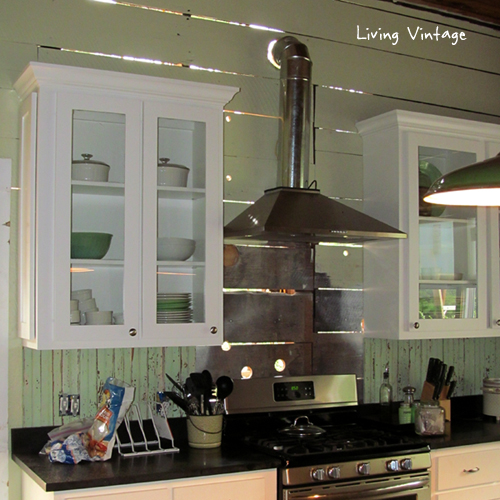
Before we tackled the project, we remodeled our kitchen. Because our kitchen design impacted window design also, those windows were replaced first. Of course, our house looked terrible from the outside for a few months.
We had a timing issue that we were luckily able to solve fairly quickly. Our carpenter in Austin, who’s also a dear friend, was not able to come help us until the Summer. Mark and I knew we couldn’t tolerate a Texas summer without a new HVAC system, and we weren’t about to do spend the money on a new HVAC system until we made the necessary energy efficiency improvements.
We hired a local carpenter, Mike Cochran, to help us with our project. Mike and his wife live next door to the old house we tore down in Grapeland. We didn’t know it at the time, but we were fortunate to meet them both.
One thing we decided to go ahead and just do during this whole process was build our mudroom. We decided that if we were going to do it, we needed to do it then. Although it would have been possible to do it later, we would have to rip out new siding and insulation to build on, and that didn’t make any sense to us.
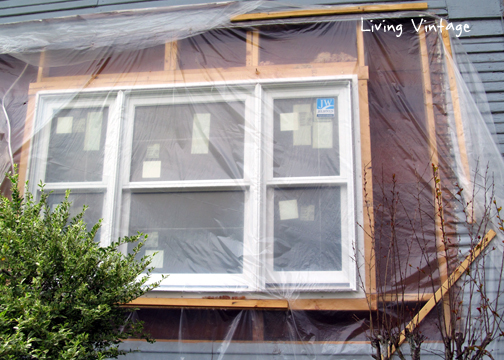
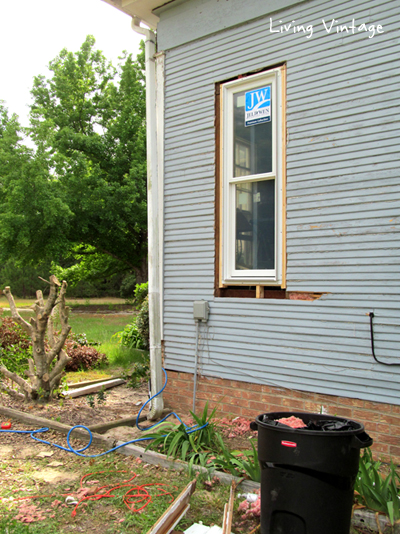
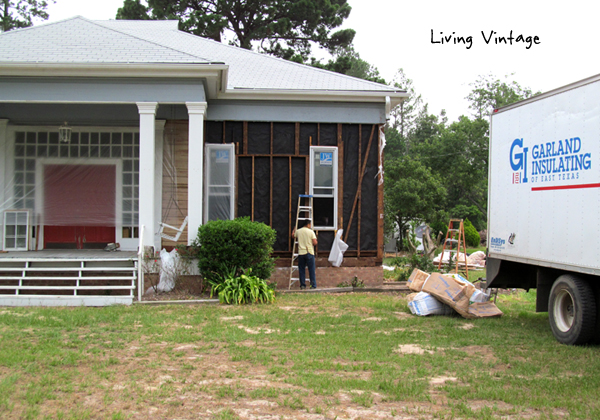
After the addition was done, the guys started replacing all of the old windows with new Jeld-Wen windows on all four sides of the house.

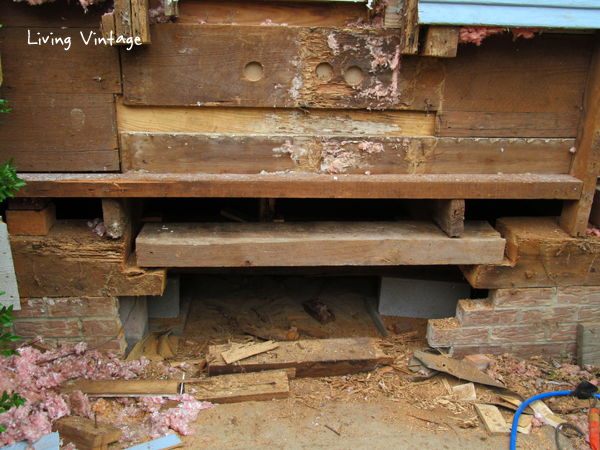
As they went around the house, the guys also assessed the perimeter of the house for moisture or termite damage. Unfortunately but not surprisingly — our house is 150 years old! — some damage was found in a few places . . .
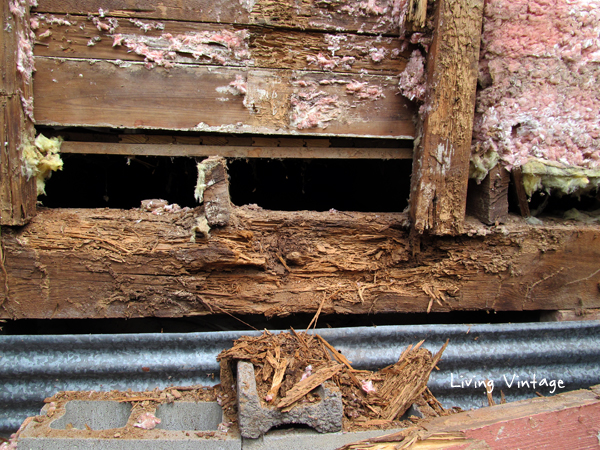
. . . but it was not significant and was easily repaired.
Of course, it wasn’t all work and no play. We all tried to make the most of it and have some fun.

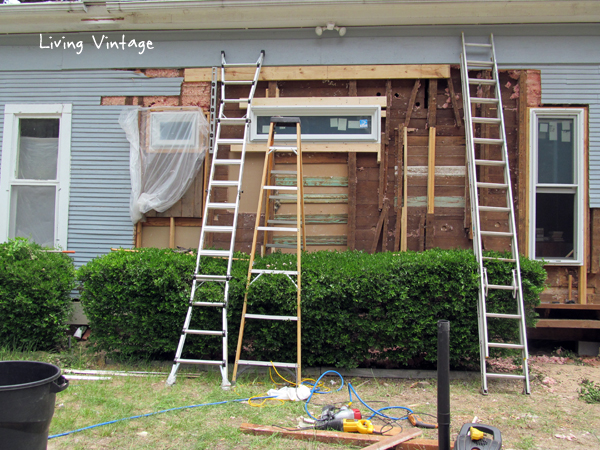
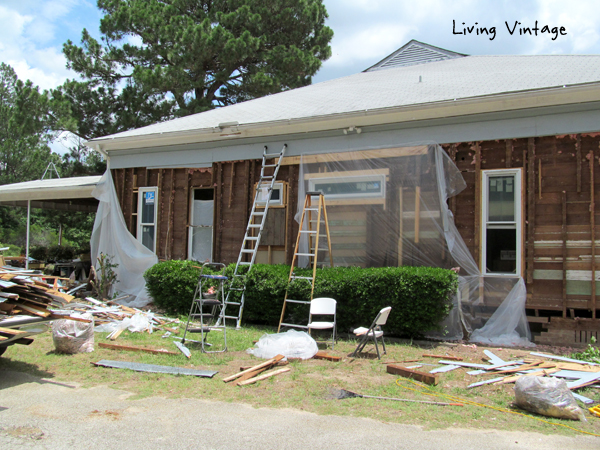
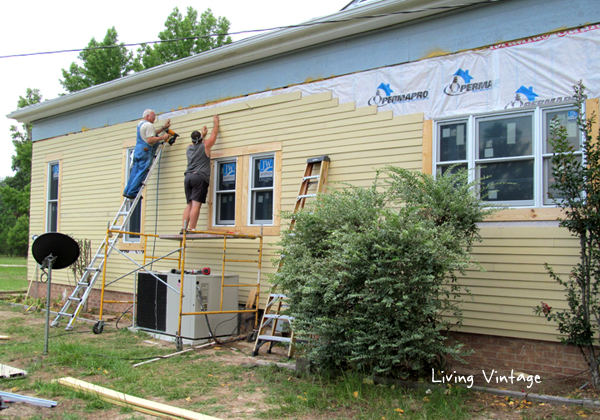
The next thing to do was to start removing the siding. Because we only had a two-man crew (to conserve costs), our house is a large 50′ x 50′ box, and progress was relatively slow, we decided to tackle two sides of the house at a time.
We were lucky to find an insulation company who was willing to make two visits to complete the work for a reasonable additional fee.
Removing the siding revealed a strange assortment of wall studs going every which way.
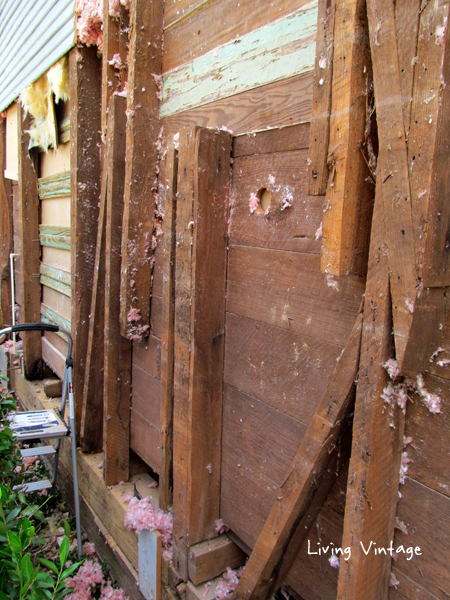
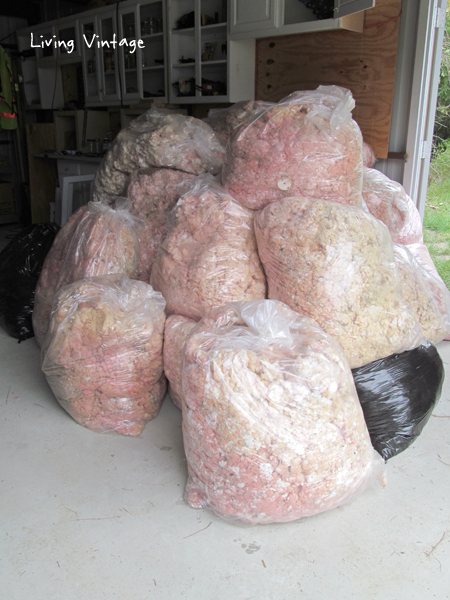
Of course, we also found lots of nasty pink, fiberglass insulation (nasty because it’s so itchy) that we bagged up as best we could. (It’s in our attic now.)
Here’s what one side of the house looked like after we removed all of the siding and pink insulation, and replaced the windows.
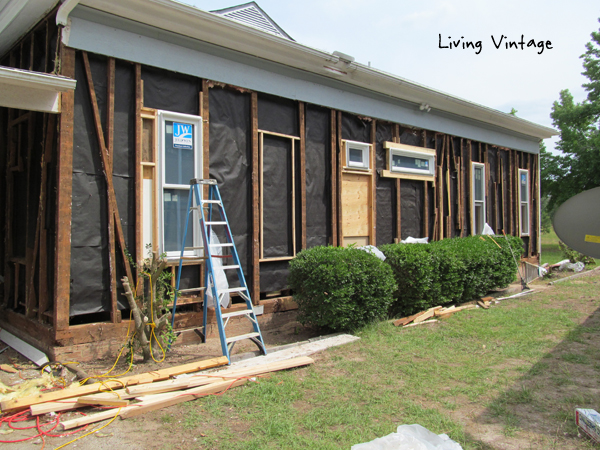
After we removed all of the siding from the first two sides of the house, we stapled tar paper between each of the wall studs. Mark knew that if we didn’t do this we do this, there was no way to prevent spray foam insulation from seeping through the cracks of the interior wood walls.
Otherwise, our interior walls would have looked like peanut butter sandwiches.

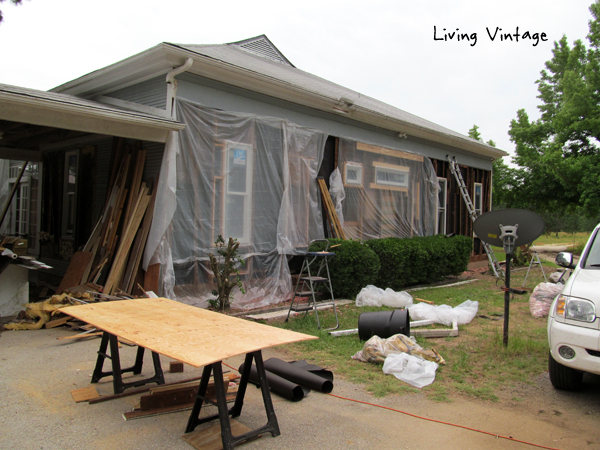
Of course, it rains in East Texas a lot, especially in the Winter and Spring, so during this entire process, we protected the house with plastic.
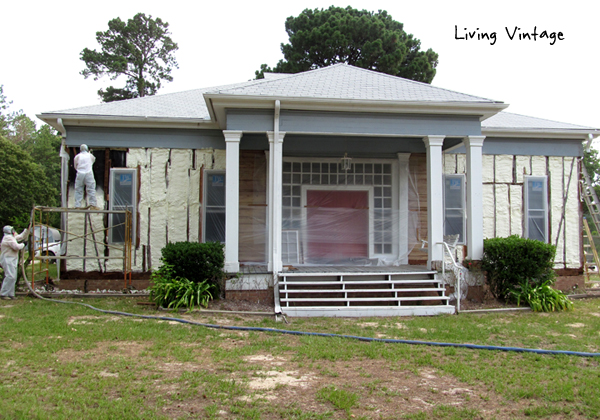
The big day for Round One of spray foam insulation finally came. We were ecstatic. It was fascinating to watch how fast the foam expanded to fill every crack and crevice.
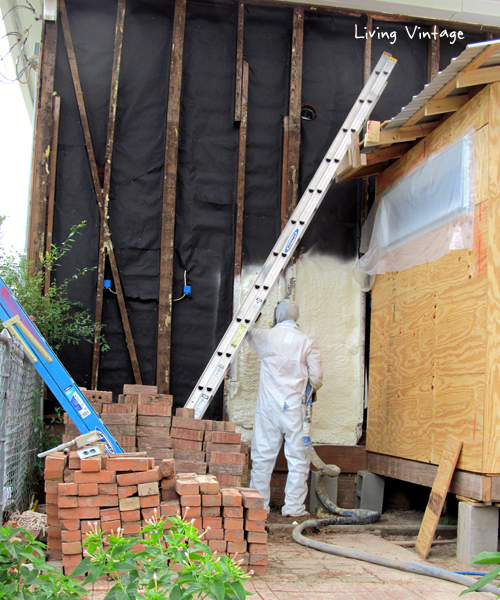
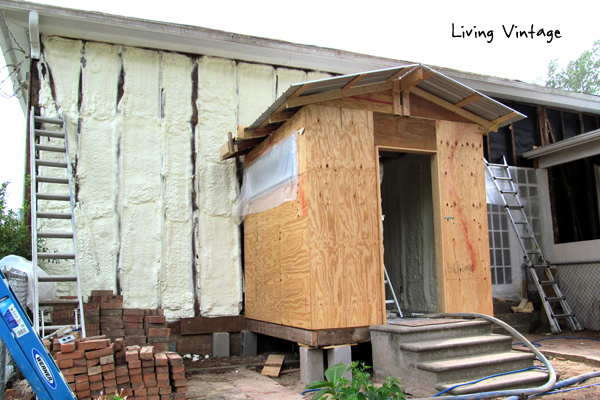
The consistency of the insulation, when dry, is about the same as a styrofoam cooler.
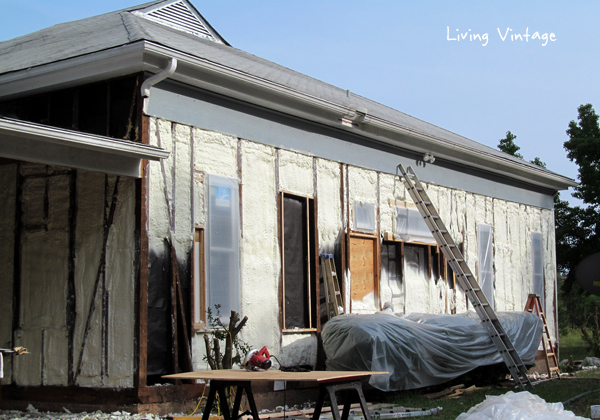
Once the insulation was good and dry, we covered up the two sides of the house with plastic and started on the remaining two sides of the house.
By this point, we were getting more efficient at gathering and bagging up the itchy, pink insulation . . . .

. . . and replacing windows.
We replaced our home office windows with slightly smaller windows — we knew we wanted to place a cabinet for our two printers underneath the window.

We were making good progress for sure, and the weather was mild and dry for the most part, a good thing since some days it felt like we were living in a barn.

The celebratory day came when Garland Insulating made their second visit to our property.

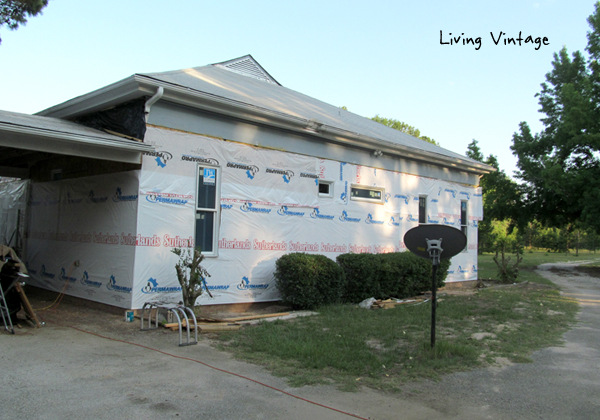
After the insulation dried, we hammered up plywood, then covered everything with a moisture barrier.

Then, we installed new Hardiplank siding. I love this siding. It’s historically appropriate and holds paint beautifully. It’s also a masonry product which saved us a bit on our homeowners insurance.
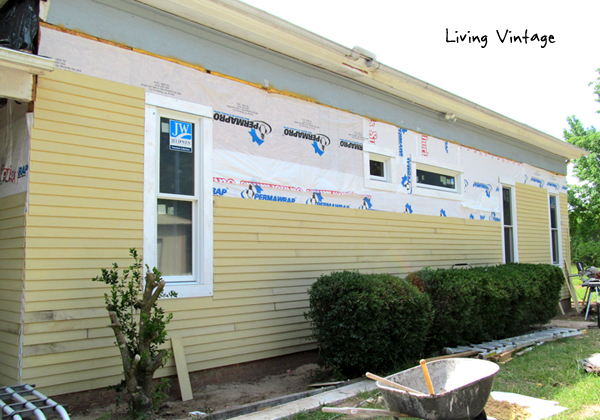
Of course, we also installed new wood trim.
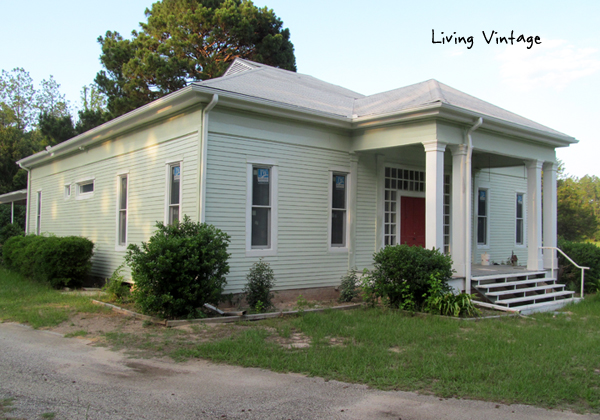
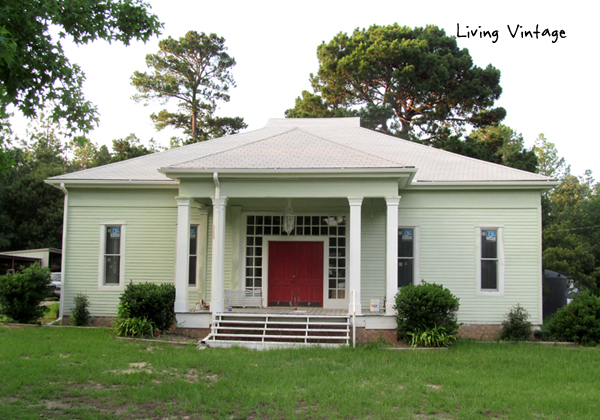
Once that project was done, we painted the house. Our house is now green (my favorite color) rather than blue.
Once our house exterior was completely finished, we upgraded to a new heat pump system which runs on electricity rather than propane.
All in all, we’re very happy with the work. It’s certainly improved the energy efficiency and the appearance of the house. The appearance of the finished siding is very close to the look of the old #117 siding, and in most cases, we kept the window sizes the same as the originals. This helped to maintain the look of the old Greek Revival style of the home.
While it wasn’t incredibly difficult work, it was time consuming. It took Mark and Mike 30 days from start to finish to complete the work, not too bad for a very small crew!

The post Improving Energy Efficiency in Our Old Home appeared first on Living Vintage.