Bob's Bloggers
A community of bloggers who live and die to DIY
diy, diy
Building a Fireplace Mantel
By DIYnot on Mar 01, 2012
Starting at the end and working backward. I finished building the majority of our mantel the other day. I used Google’s free application, SketchUp, to crystallize the final design. The original mantel looked like this:
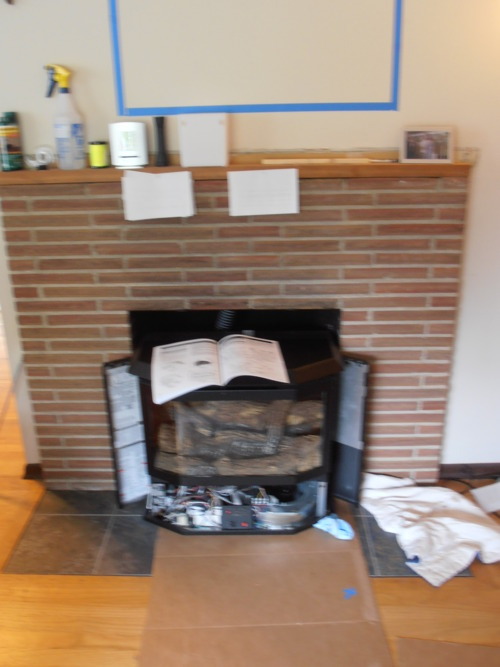
Kelly came up with the idea to replace our old oil furnace with a highly efficient Mantis gas fireplace. When we decided it was the right thing to do, we also rearranged the whole living room.
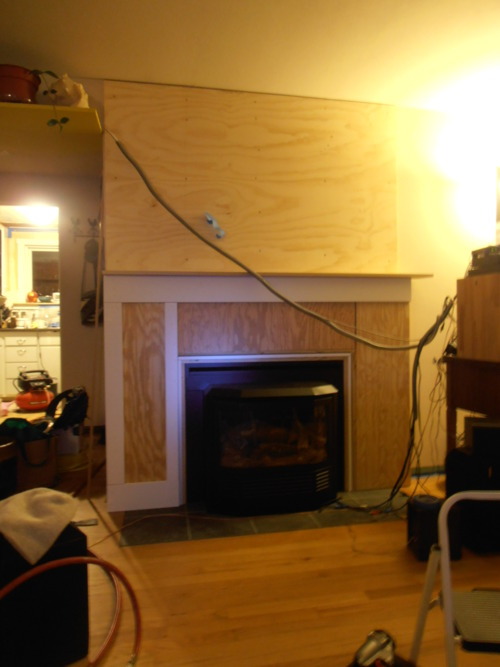
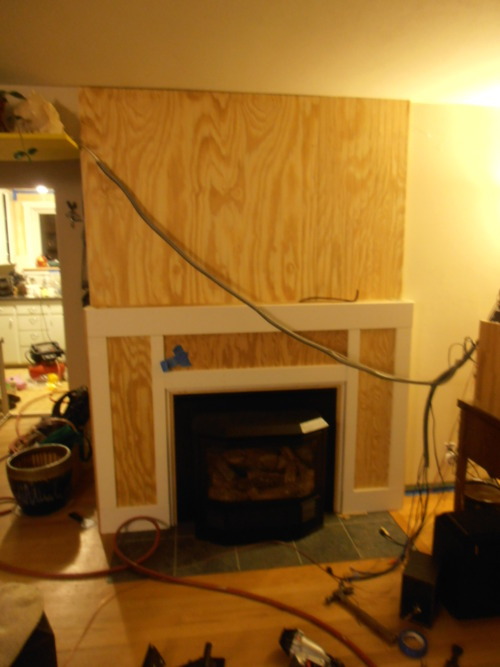
Once we improved the living room layout, part of which involved purchasing a flat screen, I proceeded to build a structure around the old brick chimney/fireplace. I didn’t mention it when I posted about building the structure how I tied into the wall framing and the mantle top. I basically screwed 2x4 legs into the wall framing. The legs each incorporated two 2x4s tied together in an L-shape with some 1/2” plywood to give me enough room to run 2x4 horizontals across the front of the chimney. Then I built a couple of rectangles out of 2x2s so that any plywood facade could be tied into framing. Here’s what I started with the other day:
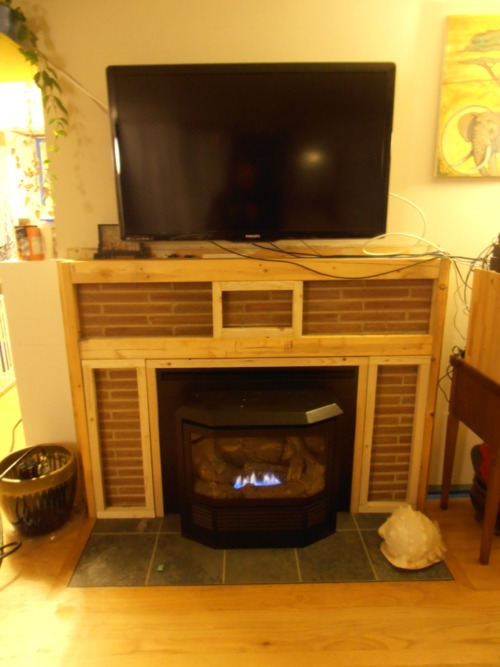
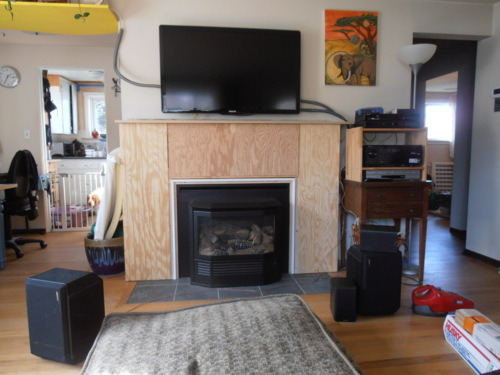
Next, I used 18 gauge 1” nails (as I recall) to attach bead board and some finish grade plywood to the sides and top center of the mantle. I had a good supply of bead board I had purchased during the summer for prototyping the exterior soffit (but then abandoned using bead board thus leaving me with a surplus of 1 1/2 4x8’ sheets) so I decided it would help distinguish the columns I was envisioning on the right and left. Here are some links to the soffit project (my post; Kelly’s post) and looking back I see that we need to post the final caulked and painted photos because the finished version looks really good.
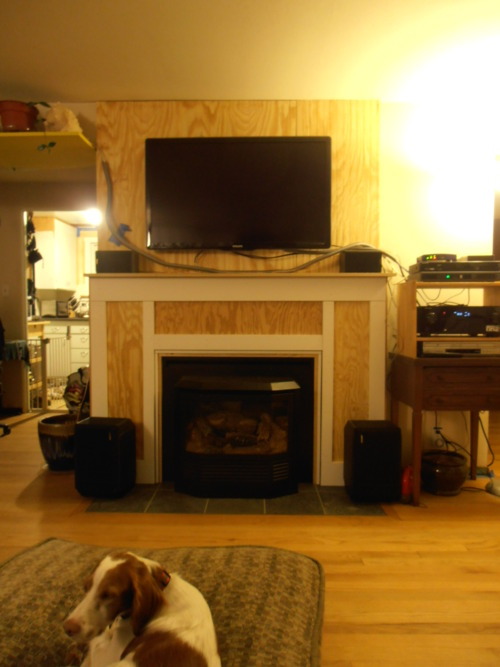
Taking down the mounted TV was a definitely a 2-3 person task but I managed to not throw out my back or make a $900 mistake when I brought it back down off the wall. Ever since I had mounted the TV I had been a bit nervous about it not crashing off the wall so getting it down and knowing I was going to build a much stronger backing was a real motivation for getting this project underway. Once the TV was down there was no going back because God knows we couldn’t survive another day without watching The Closer :-).
Here I have the 3/4” cabinet grade plywood fastened to the wall with screws and 12 gauge nails. I’ve started nailing in the MDF 1x6” across the top of the mantle and on the base, 1x4” and 1x3” legs on the left column.
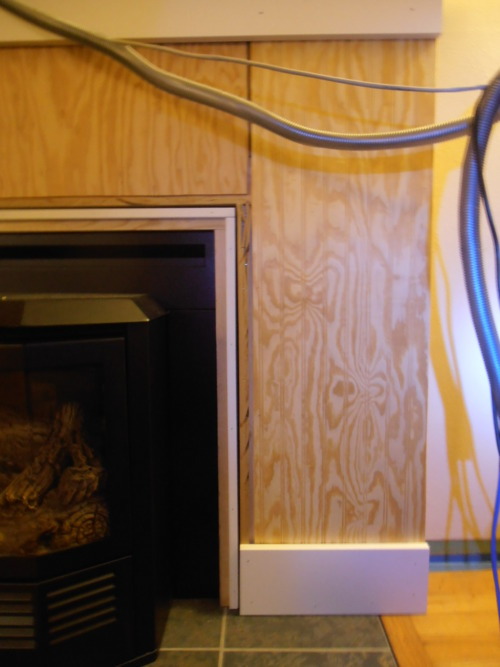
Before I attached the legs, I had to build out from the 2x2 and 2x4 structure at the edges around the fireplace flange so that I would have a single plane to attach the MDF. When I previously fastened the plywood, I left a buffer of about 1/2” so that I wouldn’t have to cut the plywood perfectly so that it would be flush with the outside of the mantle and the inside (near the flange). I ripped down (using my table saw setup) some MDF 3/8” strips to get me close to the plane I wanted. This helped me get flush in three dimensions (with the plywood and into the fireplace opening with the plane of the 2x2s). It’s hard to see but when your strips are very small, MDF splits pretty easy when you hit it with a nail so I switched over to staples. One split I had to rip out and put in a small piece (Robert had a name for this practice/piece but I can’t remember it at the moment). While my work wasn’t perfect, I decided it was good enough and pushed on.
Before remounting the TV I put 1/4” bead board across the breadth of the plywood backer. I needed to cut one sheet into two 42” tall sections so that the beads would line up vertically and so that I could use the lap edging that adorns the long sides of bead board (the lap edging allows you to butt the long side of the sheets together so that the joint just looks like another bead).
If you made it this far… thanks! Now go back to the beginning and hopefully you’ll appreciate the final (almost) product. After I re-attached the TV mount, Kelly helped me get the TV back on the mounting arm. Fortunately for me, she came home at the perfect time—all of the construction was done and I was starting to sweat bullets that I couldn’t get the weighty TV back on the the mount by myself.
To finish the project I need to run some more MDF vertically toward the ceiling from the top of the mantel. In my mind this will carry the outside lines of the two columns up toward the ceiling and emphasize the chimney. We also need to finalize how these legs will someday tie into crown molding: so there is a horizontal detail at the very top of the bead board (where it meets the ceiling) that still needs to be worked out.
Thanks for reading!
—Matt
blog comments powered by Disqus