Bob's Bloggers
A community of bloggers who live and die to DIY
Mechanicalities
By House*Tweaking on Nov 18, 2011
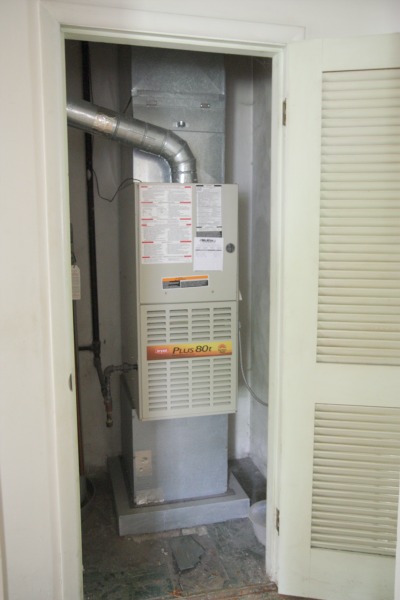
The mechanical closet at the Underdog is in the hallway that leads back to the bedrooms. Notice I said ‘closet’ not room.
It houses the furnace {shown} and water heater {not shown}. The closet is actually a little wider than the door opening and the water heater sits back in the left-hand corner. To take a picture of this teeny space, I have to stand in the bedroom across the hallway and I can’t get a shot of the water heater because that would require me going into the narrow hall for the angle needed but then I’m way too close. Are you following me? Basically, it’s a tiny closet off a very narrow hallway and it’s difficult to photograph. Take my word for it.
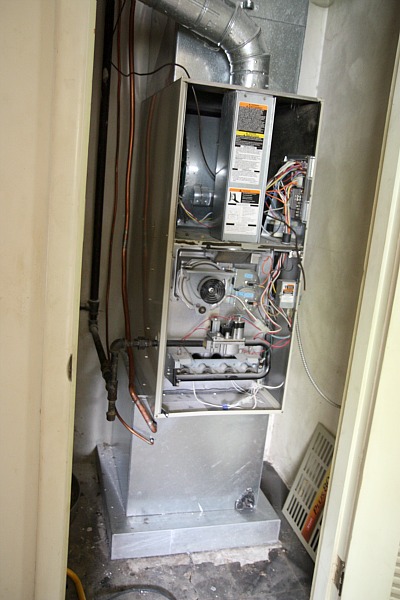
I shared the story of our craigslist heat pump back in June. {The Underdog came to us with no central air.} In case you missed it you can look back or just know that we paid $500 for the unit. Since then Handy Hubby has been busy installing the heat pump and wiring it to the furnace.
I’m not going to pretend I know what HH did. I have no idea. Luckily, HH has a buddy at work who has done DIY HVAC stuff before and he lent HH a hand with the hookup. What I can tell you is that HH ran copper pipes from the heat pump to the furnace. You can see the addition of two copper pipes near the bottom left-hand corner of the furnace just below where the panel would be.
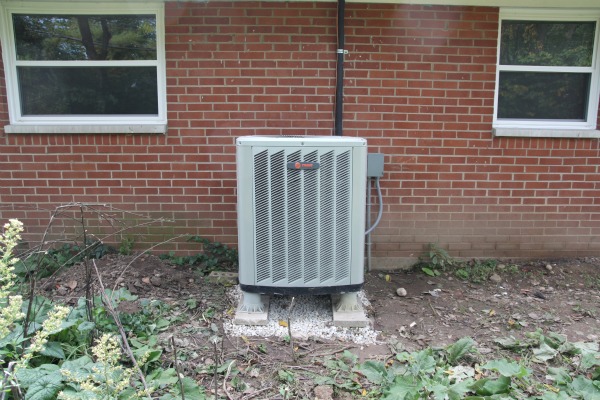
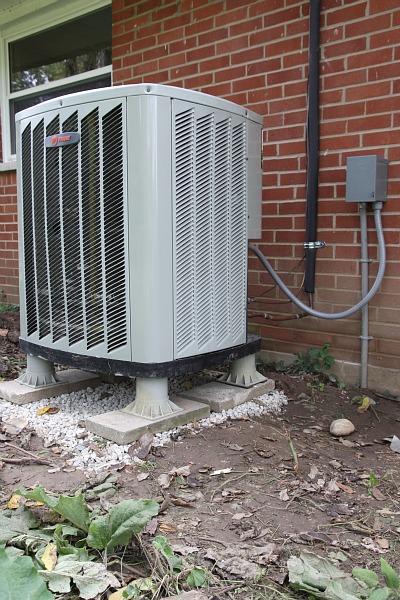
The heat pump is located at the back of the house between the master bedroom and master bathroom windows.
If you look closely, you’ll see where those two aforementioned copper pipes come out at the back of the unit and run into the house.
It was a very happy day when HH came home from a long evening at the Underdog to announce, “The heat pump works!” Yep. My HH installed that sucker himself. Well, okay, with the help of a friend. But still. Buying the craigslist unit for $500 and DIYing the install saved us about $2,000-$2,500!!!!!
And you know what that means. More money for pretty stuff. Cha-ching.
But, alas, this post isn’t about pretty things. It’s about the guts of the house…what makes it work…what makes it livable and comfortable to be in. And that stuff isn’t necessarily pretty. Unless you like cubes of steel and electrical components. To each his own.
So, back to the teeny mechanical closet we go.
While the water heater seems to be acting fine now, we’re sure it’s going to poop out at any moment. Probably the moment right after we move in. The water heater is ~10 years old. When HH got to thinking ahead, he realized that to replace the old water heater he’d have to remove the furnace due to the narrow access to the closet. Ugh. Not exactly ideal.
So, HH took the bull by the horns and opened up the mechanical room’s doorway to allow easier access to the water heater.
There’s that water heater I’ve been telling you about! The widened doorway gives HH direct access to the water heater. Normally, this is where I say ‘Yay!’ but there was one sliver of a problem.
Looking back to the first image…
…you’ll see that there was a single louvered door on the mechanical room. Now that the doorway is wider, HH had to look at pricing out bifold louvers. Bifold versus hinged because the hall is way too narrow to allow for a large door to swing out. And louvered versus solid to allow proper ventilation for the furnace.
You’d think that for such an eyesore those doors-that-can’t-make-up-their-minds-to-be-a-door-or-a-shutter would be cheap. Wrong. HH priced a set of bifold louvers for the mechanical room at $300. Neither of us wanted to spend $300 on something that we weren’t crazy about to begin with.
As luck would have it, on the way back to the Underdog from pricing out the doors at Home Depot HH spied something on the side of the road. Laid out with the trash were a set of louvered doors! Right on our street!
It was fate. HH didn’t think twice about hauling them back to the Underdog. While the measurements aren’t an exact fit our mechanical room, HH is certain he can make them work. And the price tag is hard to beat. You know what they say about one man’s trash… Here’s my ‘Yay!’ now.
So, that’s a lot of words about the smallest ‘room’ in our Underdog. While it isn’t much to look at, a room that houses a furnace and water heater is necessary. And making it work for us is just as important. When that old water heater comes out, I think HH is going to be patting himself on the back for opening up the doorway. If not, I will.
In other earth-shattering news, House*Tweaking turns 2 today! What a post for a blogiversary, right? I decided that two anniversaries in one week {our wedding anniversary + blogiversary = 2} were a bit much. So, next week will be the official blogiversary week. And it all kicks off with a profitable giveaway on Monday. In short, I’ve partnered with Apartment Guide to offer holiday decor ideas and seasonal organization solutions for apartment dwellers. Check in Monday for all the details!
For fun, I went back and read my very first H*T post. I noticed a few things: 1) No pictures. Rookie mistake. 2) My parentheses have turned into curly brackets…except when following a number. This is my own made-up rule. 3) I’m still not tech savvy. 4) ‘Hubby’ is now referred to as ‘Handy Hubby.’ 5) Miraculously, H*T did keep me from wanting a third child. But my uterus had other plans. 6) Oprah ended her show this year. 7) This blog has fueled my hunger to read and write. It’s taught me new things – and not just about design – but life and myself in general. It’s been a wonderful outlet for the now more-than-a-zillion ideas whirling around in my head. And it’s most definitely been a great place to journal our home improvement projects…not that I ever imagined renovating a 1958 ranch named the Underdog would be a part of that.
Have a great pre-Turkey weekend!
images: all Dana Miller for House*Tweaking
blog comments powered by Disqus


