Bob's Bloggers
A community of bloggers who live and die to DIY
woodworking, diy
Building Poster Frames
By Picardy Project on Feb 17, 2012
With 4 National Park posters to frame... ... and another 2 purchased (Chris and I have a rule that we only get these posters from parks we've been to)
 (found here)
 (found here) ...Chris and I headed out to see how much it would cost to get 6 16x20 frames. The answer? Not cheap. Man, picture frames weirdly cost a lot. Not technically a lot, but for it just being 4 pieces of wood joined together with a piece of glass on top I wanted to barf when I saw the $45 price tag at Michaels. Even with the coupons they always have, it was going to be nearly $150 just in frames. Chris was especially flabbergasted and looked at me and asked, "Why don't we just figure out how to build them?"
FABULOUS idea!
And so started a new adventure in building.
We made a practice one in MDF (only a $6 investment). We measured things out to see what length all the sides needed to be We went for a 3/8"-ish reveal all around the border of the artwork, and once all the lengths were cut...
 ...we used the dado stack on the tablesaw and cut a rabbet out in the back (the groove the artwork and glass would sit in)
 Next, we consulted the router bits to see what kind of detail we would cut into the edges
 I settled on a Roman Ogee
 We left the interior edge alone because the MDF stock came with one rounded edge, and after we used the router table to cut the other side we used these right angle brackets to attach everything together
 And then, we were done!
 Neither of us was super thrilled with the edges of the MDF (they can tend to fray)
 But because this was just our $6 test run, we weren't too broken up about it. We were pretty sure however that we had a pretty good system worked out for putting them all together so we headed out to HD and bought 3 1/2" poplar stock for our 6 frames - for a total of $60.
With our stock purchased the first step was using the dado to cut the rabbet in the back Next, we used the router table again to cut the outside pattern into the stock (we switched things up and used a Double Roman this time around)
 This time around we had to cut the inside as well (poplar doesn't come with a rounded edge, damnit.) So we ran it through the router table again to make the inside edge rounded over.
At this point we cut all the stock down to the lengths we needed We could have done that step before, but with 6 frames and 4 pieces per frame that would be 24 runs with the dado, the router on the outside edge, and the router on the inside edge. Cutting the lengths down after all that work was done made things go a lot faster. We cut 4 pieces for the first frame, made sure everything lined up correctly, then used that set as a template to cut all the other wood for the remaining 5 frames.
Once all the lengths were cut down we sanded and patched (some areas needed to be patched where knots were) Next, we set things up to get assembled
 We ran a bead of wood glue on all the ends
 Used the same hardware...
 ...and it was a working frame! When we flipped it over there were small gaps in the corners
 But by running a small amount of wood glue into that gap and sanding over it, sanding dust filled in the gap and fixed in place because of the bead of wood glue we'd ran over it
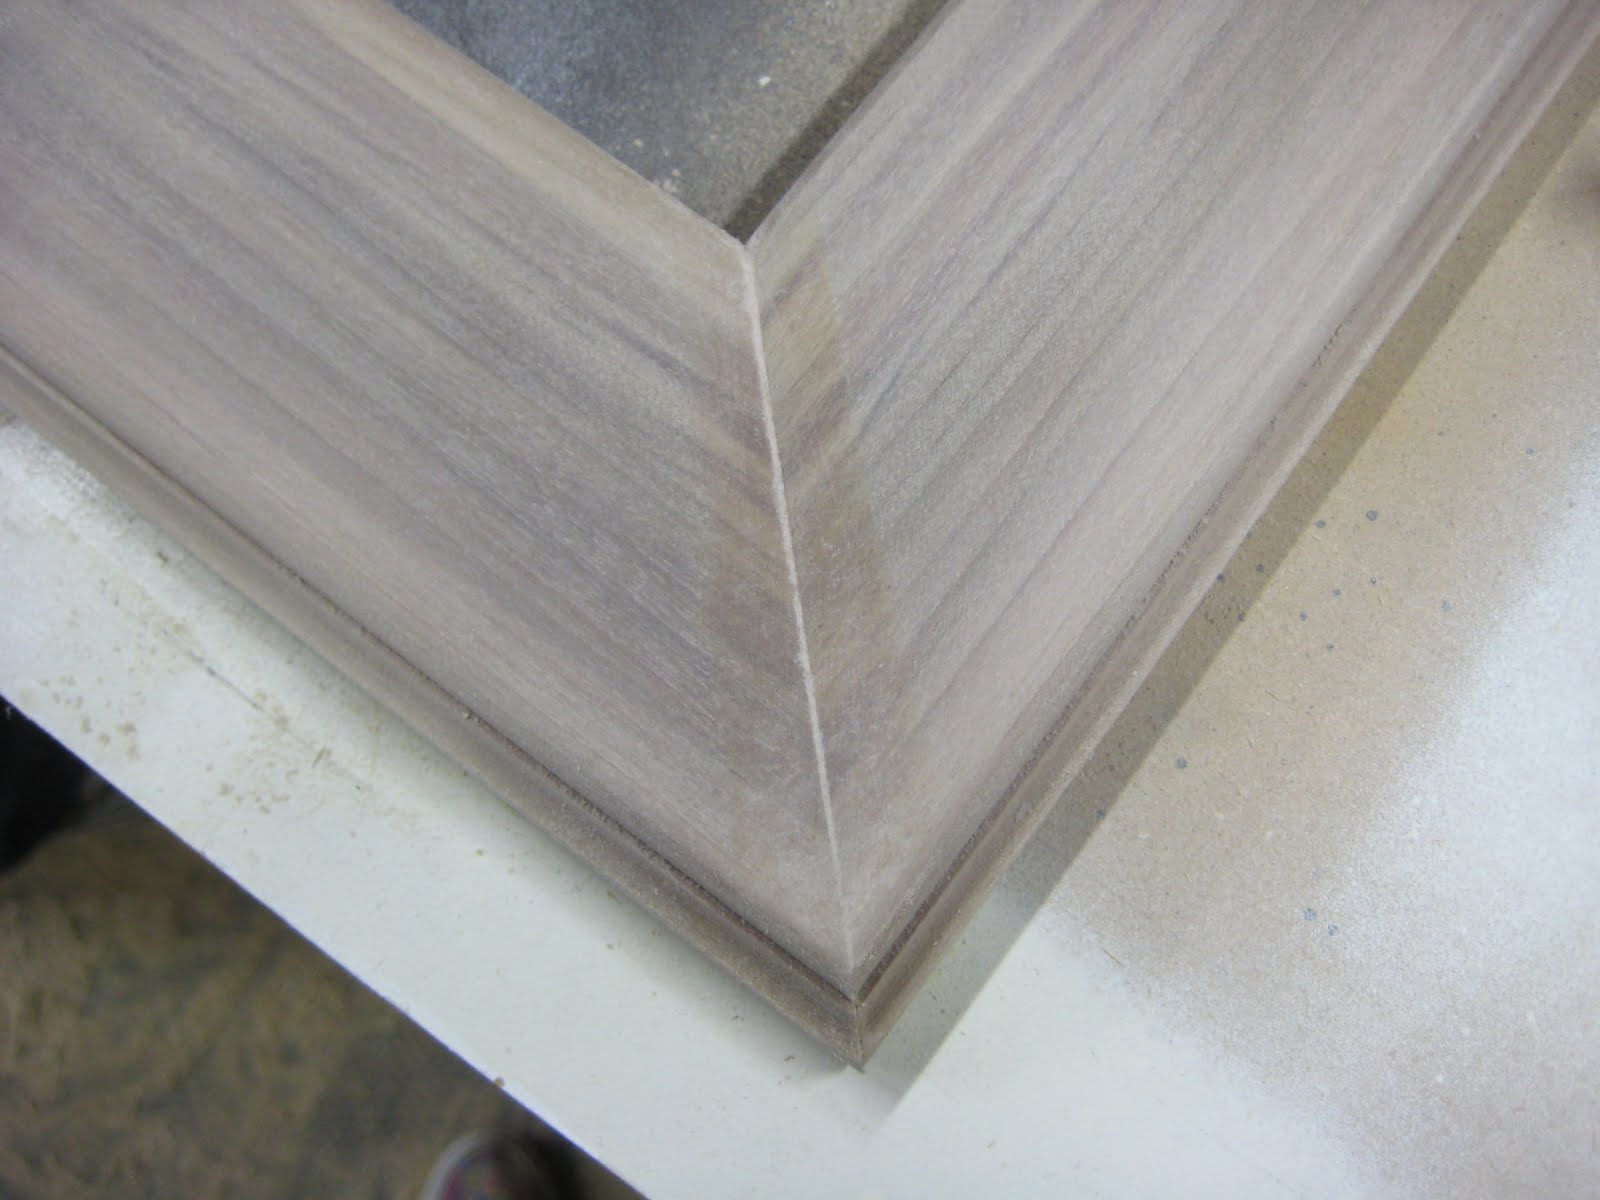 And then, the frame was complete!
 We repeated the process 5 more times
 The next day I laid everything out...
 ...and did some minor sanding here and there and then painted everything with one coat of primer and two coats of glossy white (the same white on the corbels and fireplace surround)
 Oh, but we're still not done.
THEN we went and got 6 pieces of glass from HD. They were sized a bit wider than we needed, but not long enough which we found out after we already cut down the first one, whoopsie. So we returned the other 5 pieces of glass from HD (the first one only cost $5) and we called a local glass place and got 6 pieces cut at the exact size we needed for $25 total.
We brought the glass home, placed it in the frame, dropped in our artwork, cut a piece of cardboard down to size for the backing and used a handy tool Chris bought online (for $25) to insert glazing points to keep everything in place

 We repeated the process for 3 more frames (we're still waiting on the other two NP posters we just bought online a couple days ago), and then brought everything inside
 I think they look really good, especially considering we've never built picture frames before. The total: $60 for poplar, $25 for glass, $25 for the glazing tool, less than $1 for the glazing points (we bought a big pack of them), and $11 in practice materials ($6 of MDF, $5 in our first piece of glass) = $121. All in all we didn't save much, but, we now have 6 frames that are built to the perfect size we want them to be, and if we want to build any frames in the future (and I've already thought of a few), we've got the tools to do it, so it'll just get cheaper and cheaper.
The upside? We learned a new skill and the frames are pretty :) We're just waiting for those last 2 prints to arrive and then all 6 frames will go up!
P.S. Seeing those lovely floors still get me all excited, eeeee!!!!! :)
