Bob's Bloggers
A community of bloggers who live and die to DIY
tile
The Herringbone Is Pretty
By Picardy Project on Feb 22, 2012
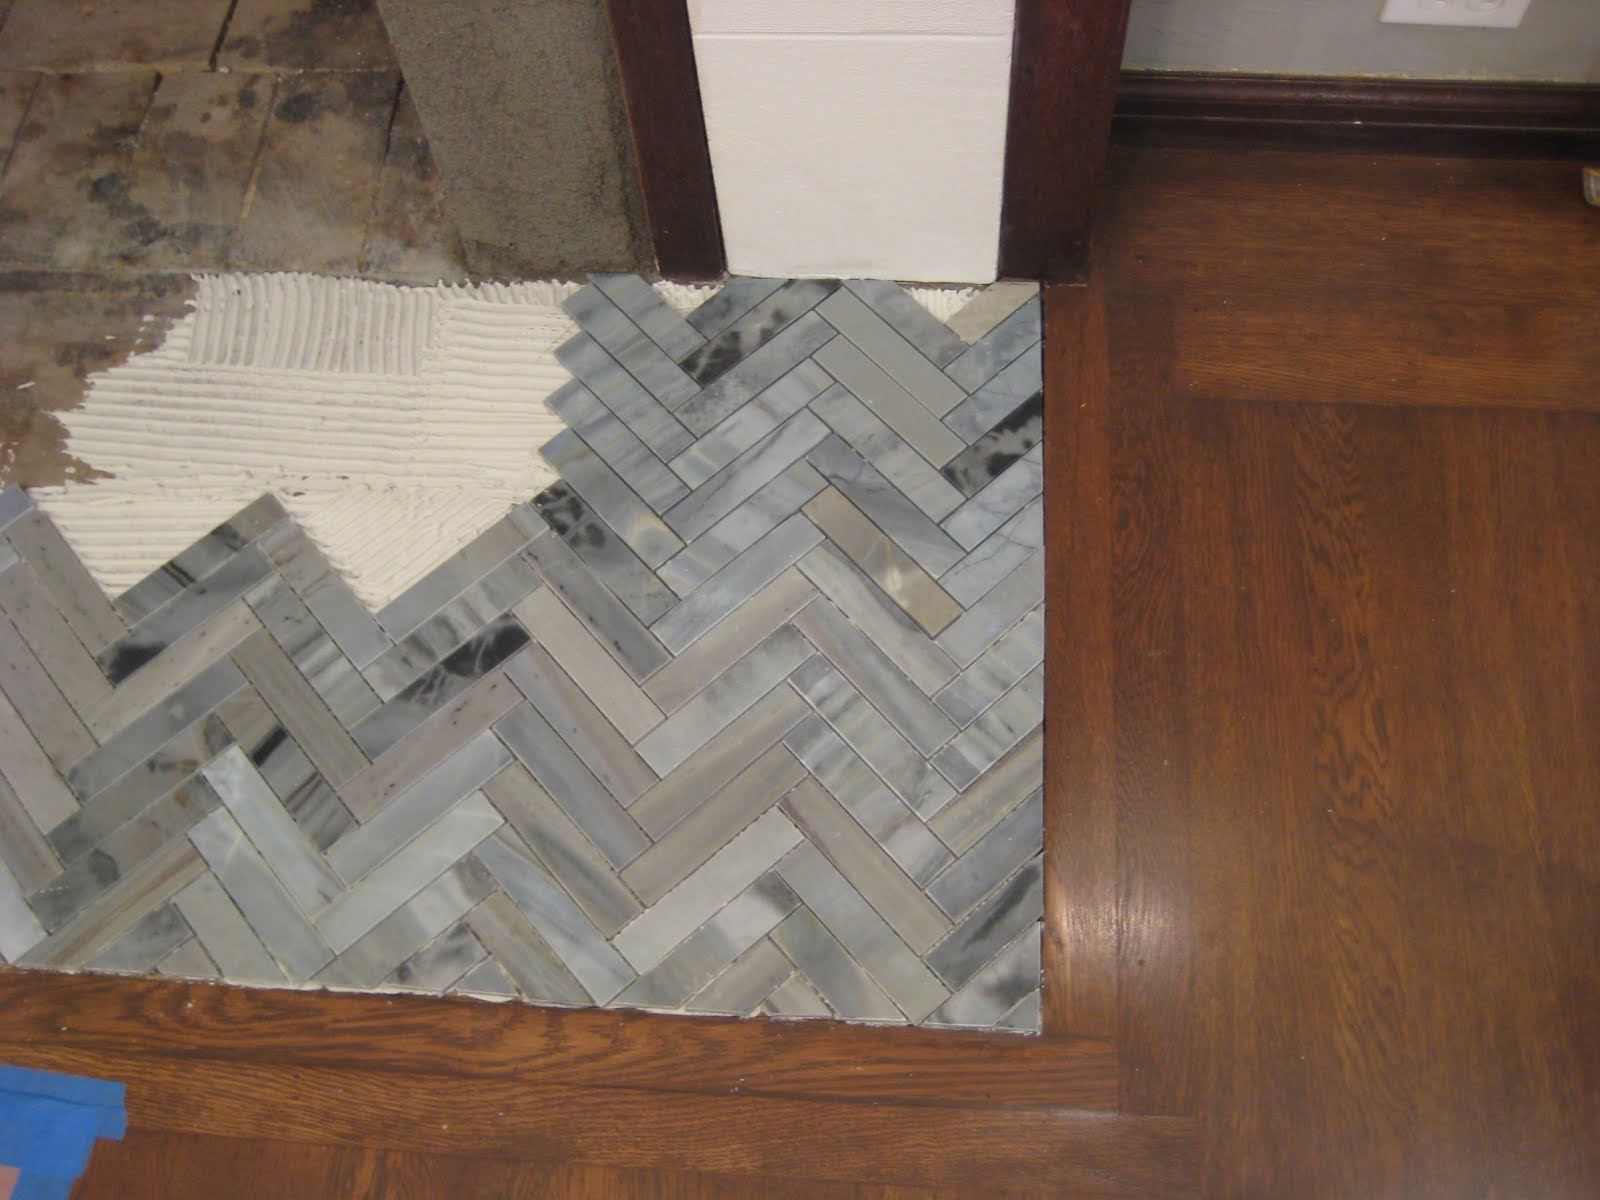
Over the three day weekend we laid the herringbone on the ground in front of the fireplace, yay! Tiling and building the table are our last two big projects for this room so it's exciting that we're making progress getting these things completed.
Sunday was a pretty busy day running errands here and there, and after we went to an Oscar lecture by a film teacher of mine while I was at Mills, we got home around 4 and hadn't done much work. Not wanting to be disappointed by going an entire weekend day without getting anything done on the house I convinced Chris we should work on the fireplace tile, "What? It'll take like 2 hours," I told Chris. To which he rolled his eyes and insisted it would take longer...
Earlier in the day we had settled on a layout. We tried centering the tile in the space, but we wanted to see what size tile would be at the ends before we were sure of the idea Sadly, with the tile centered it didn't line up very well and the pieces at the ends were really tiny...
 ...so we had to nix it. We tried to shift things so the bottom point of the sheet was at the centered point (about 35"). But again, it didn't line up well and so I decided I'd work from the end this time. I just set a sheet down at the end with an amount of tile that would need to be cut that I didn't find objectionable
 And then we filled in the rest of the tiles going left to see what would happen on the other end
 And it didn't look bad, hooray.
Once the pattern was set (and the bottom two points would hit into the hardwood transition so that we made sure the first row of sheets was laid down straight), we were ready to start tiling Most of you probably think having a bottle of lotion sitting there is strange, and it probably is, but I have SUPER dry skin and so whenever we tile I always have a bottle of lotion handy because after using the thinset and the tile saw and rinsing my hands over and over and over again my hands get really really dry and so I'm constantly putting lotion on them so my skin doesn't crack.
With our tiling station all set, it was time to get started And man, seeing that first tile go down was veeeeerrrrrry exciting :)
 So pretty :)
We had a small triangle area that needed to be filled with 4 different tiles While Chris worked on laying the big sheets, I measured and marked where the four individual tiles needed to be cut and one by one and took them outside to cut them down on the tile saw. But that got annoying quick because of all the trips back and forth. Chris developed a good system of laying out 4 tiles, and then putting a ruler across all 4 at the same time and marking them (duh!)
 Then I took all 4 outside and cut them down, then we back-buttered them, laid them down and used the grout float to make sure everything was all on the same level
 It was just smooth sailing from there as we got more and more sheets
 But that "oh it'll just take 2 hour" window? Totally blew past it. That top row was a total doozy. It took a lot of difficult measuring because we couldn't lay the sheet down and mark easily where the cuts needed to be made. Instead, we had to get the tape measure out and measure from all the edges and points and hope that Chris' markings were correct and my cuts were even (the sheets were larger than normal so I had to run it 3 separate times through the tile saw instead of one time all the way through on each side)
 But we got better and better
 The part that took the longest though? All those cuts in those little triangle areas along the top were a lot more difficult than the bottom area for a few reasons: they were in an inconvenient area because of the recently laid tiles right in front of them and we couldn't lay down the tiles flat and do a group measurement like we did with the lower area because these triangles hit up against the white stone or a lip in the concrete inside the fireplace area. As a result, Chris gave me the tiles one by one and I went outside to make the cuts.
What was my working environment like considering we started at 4pm and we had gone past the 2 hour mark? No, I wasn't bent over at the waist so the garage had a nice view of my rear end, I was bent over that far so that I didn't block the light. If my head was any higher I couldn't see the line Chris had marked on the tile, and as it was I could barely see it at this strange position, so I wasn't rocking the boat any more than it was already rocking. Saws + darkness = no fun. Of course, with a tile saw it's actually quite difficult to saw your finger off, but I wasn't taking any chances.
Thankfully around the 3 1/2 hour mark we finished and as Chris cleaned up I ran out to get us Chinese (the ultimate late project renovation dinner) and we sat down to eat at 8. The next morning it was lots of fun to oogle the tile :)

 It gets me excited to do the rest of the tile right above it!
